
RECOMMENDED TOOLS & PREPARATION
| Category | Recommended Tools / Materials | Purpose |
|---|---|---|
| Hand Tools | Ratchet, extension bars, and sockets (8mm, 10mm, 11mm, 13mm, 15mm) | Removing intake piping, coolant lines, and EGR bolts. |
| Sealing & Protection | High-temp anti-seize, electrical tape, zip ties | Lubricating exhaust bolts, weatherproofing unused plugs, and securing loose wires. |
| Fluid Management | Clean coolant drain pan, fresh coolant | Draining, capturing, and refilling the secondary cooling system. |
STEP-BY-STEP REMOVAL & INSTALLATION
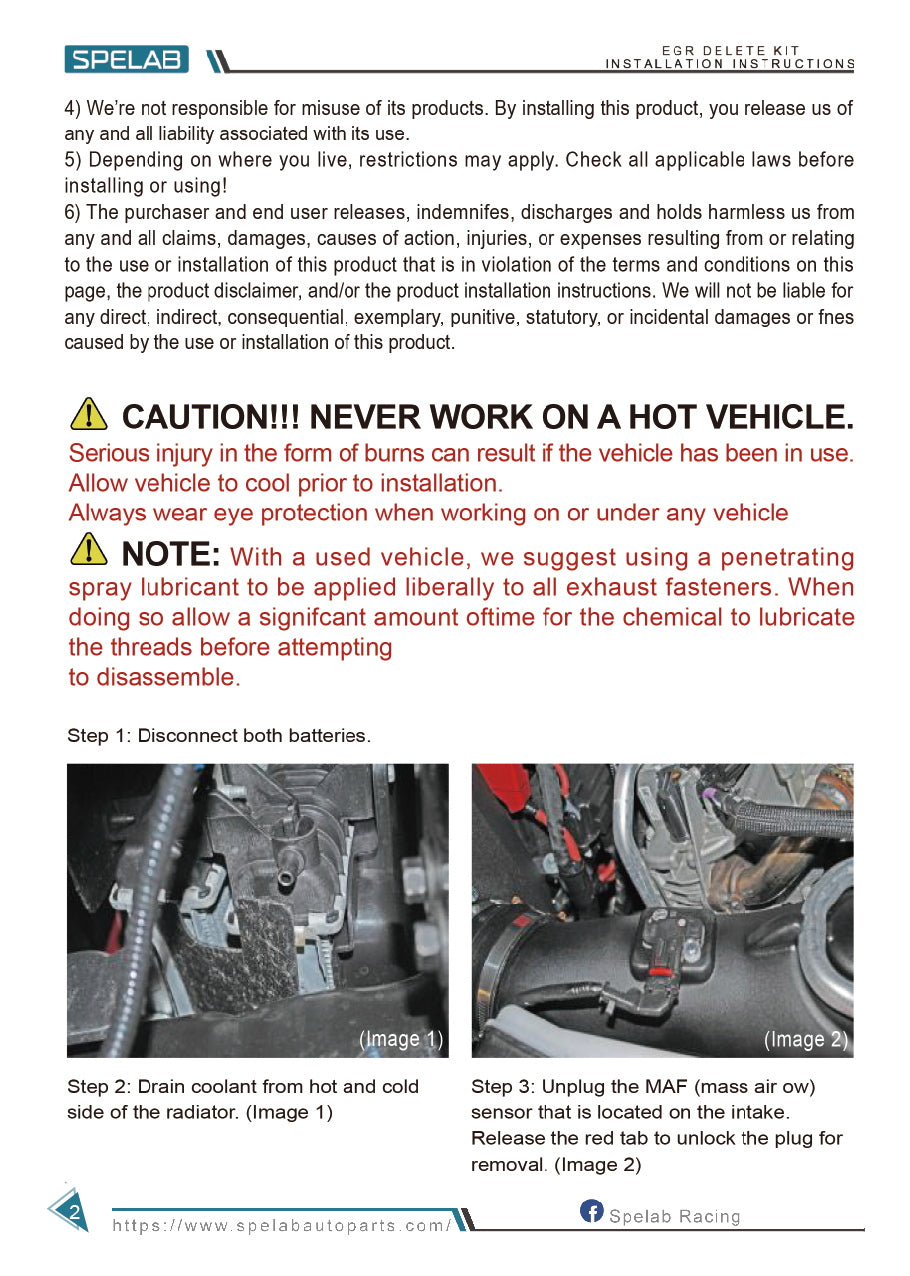
- Disconnect both negative battery cables using a 10mm wrench/socket to secure the electrical system.
- Locate the petcock/drain valve on the bottom driver's side corner of the radiator. Place a clean drain pan underneath and drain the secondary cooling system. Once drained, close the valve securely.
- Remove the plastic decorative engine cover from the top of the engine.
- Locate the crankcase ventilation (CCV) hose connected to the intake tube. Press the locking tabs and pull the CCV tube off the intake.
- Unplug the Mass Air Flow (MAF) sensor electrical connector and the airbox restriction sensor plug.
- Loosen the hose clamp securing the intake tube to the turbocharger inlet. Remove the entire airbox lid and intake tube assembly from the vehicle.
- Disconnect the wire harness clips that are secured to the plastic cold-side charge air cooler (CAC) pipe.
- Unplug the temperature/pressure sensor electrical connector located on the cold-side CAC pipe.
- Loosen the clamps on both ends of the cold-side CAC pipe and remove the pipe from the engine bay.
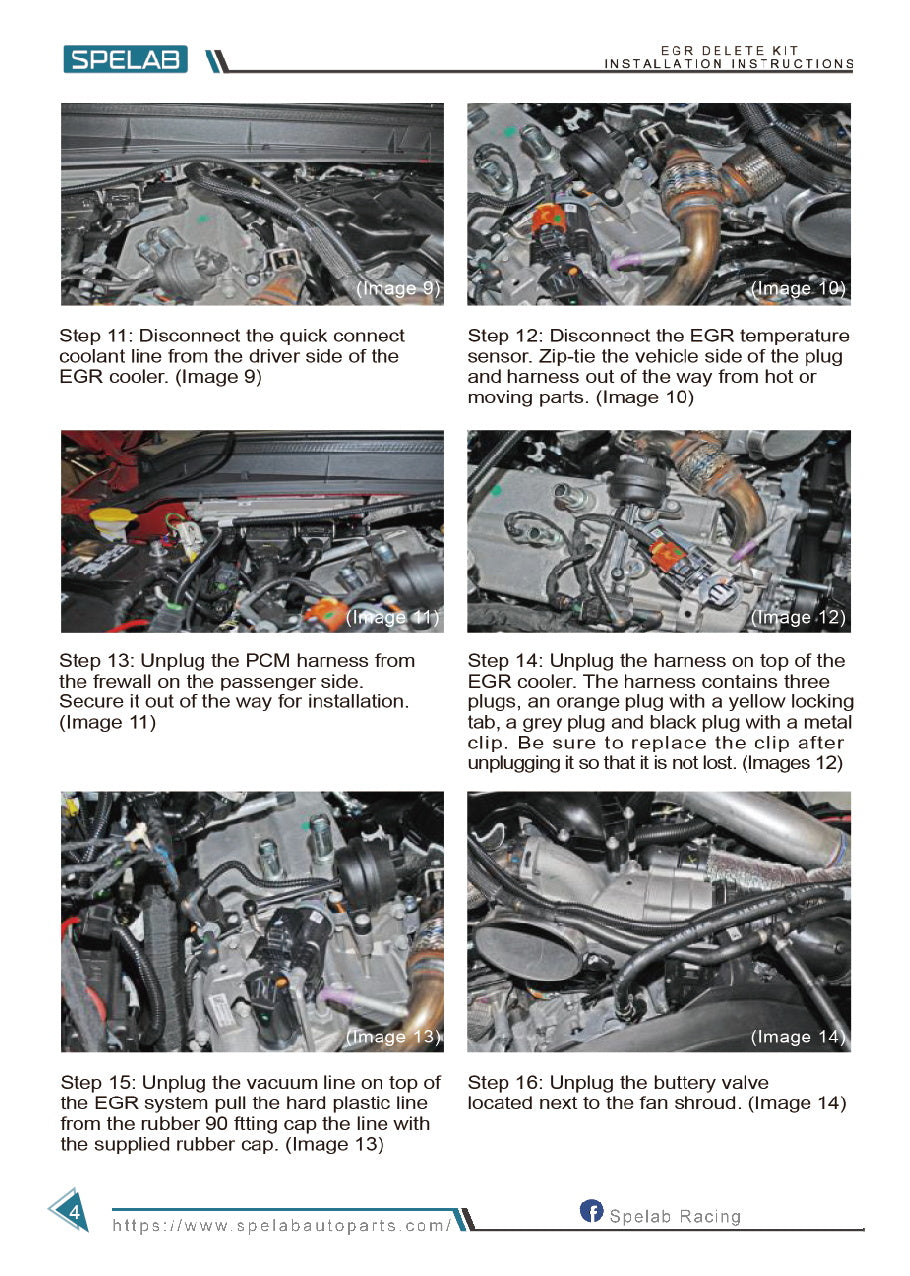
- Locate and unplug the electrical connector from the Exhaust Gas Temperature (EGT) sensor on the EGR cooler.
- Unplug the main multi-pin electrical connector from the EGR throttle control valve.
- Unplug the EGR bypass valve solenoid electrical connector.
- Carefully disconnect the rubber vacuum line from the EGR valve actuator.
- Use a panel tool or pliers to release all plastic wire harness retaining clips attached to the metal EGR cooler brackets.
- Pull the main wiring harness back towards the firewall and temporarily secure it out of the way to clear your workspace.
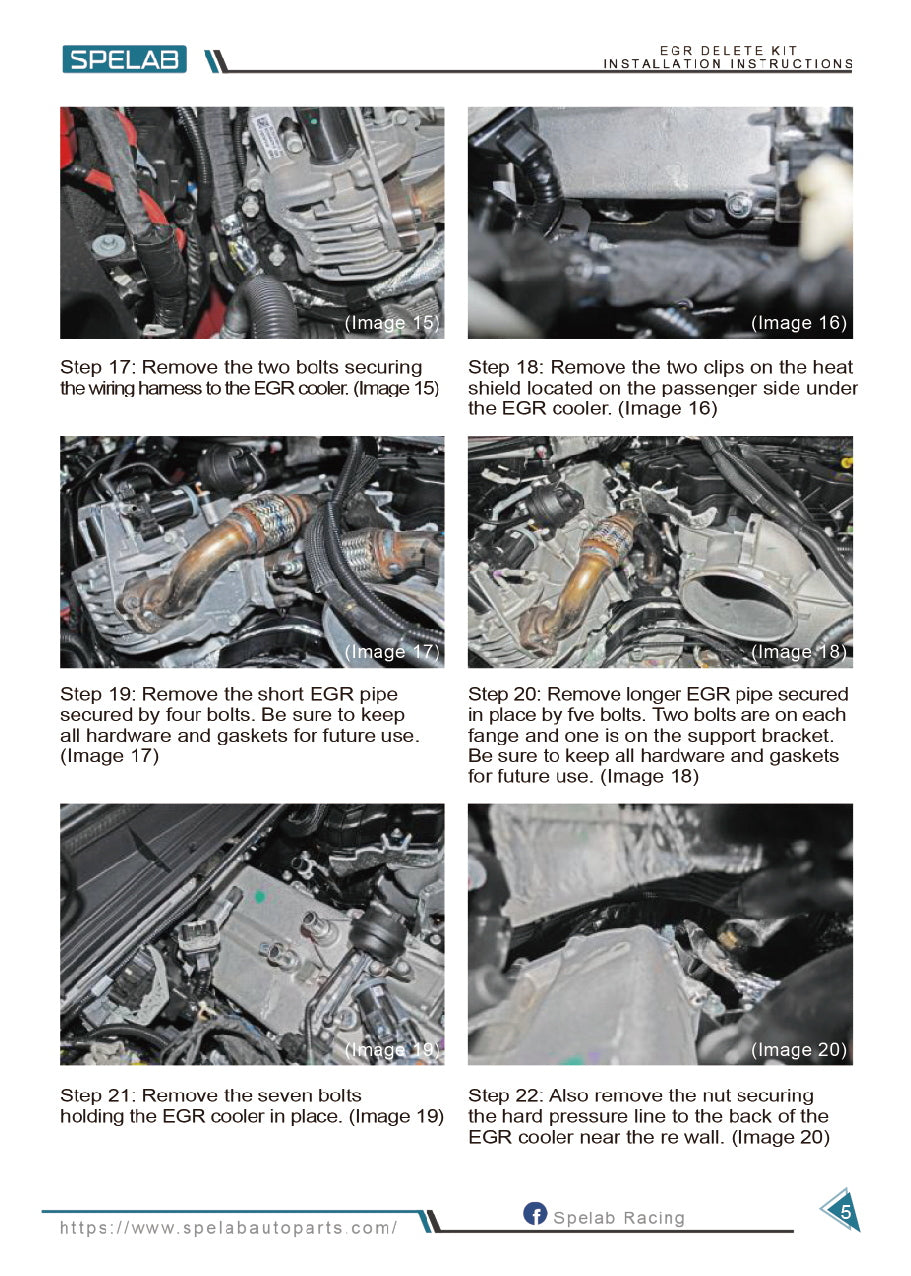
- Using a 10mm socket, remove the 4 bolts securing the metal EGR crossover tube to the intake manifold and EGR valve. Remove the tube and the old gaskets.
- Loosen and remove the bolt holding the exhaust gas pressure sensor bracket.
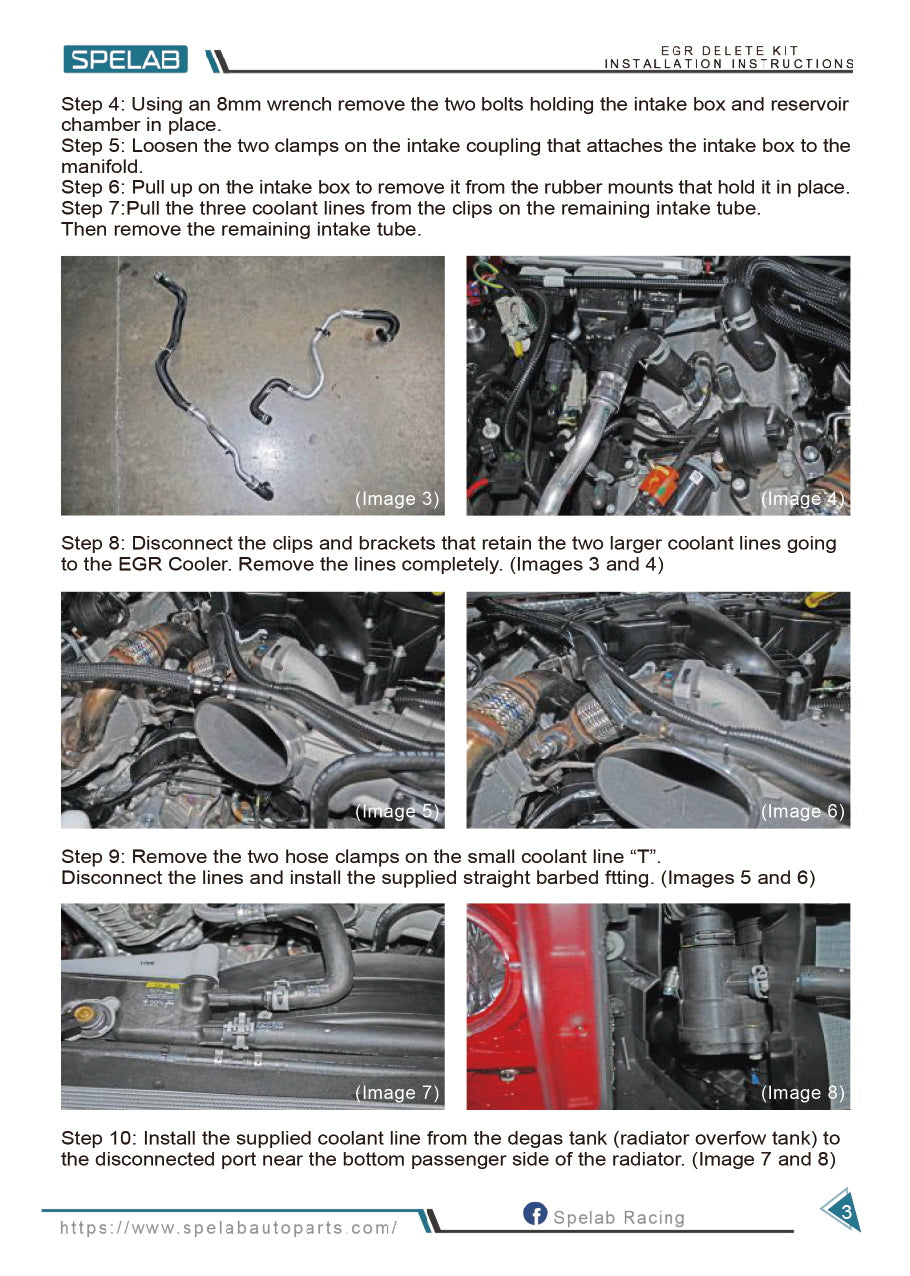
- Release the spring tension clamp and disconnect the small coolant bypass hose at the front of the EGR cooler.
- Release the quick-disconnect fitting on the rear coolant hose located near the firewall.
- Using a 13mm deep socket, remove the two nuts securing the EGR cooler flange to the exhaust manifold. (Tip: It is highly recommended to apply penetrating oil beforehand.)
- Remove the two 10mm mounting bolts holding the front of the EGR cooler assembly to the engine block.
- Remove the two 13mm mounting bolts securing the rear of the EGR cooler assembly near the firewall.
- Carefully lift and wiggle the heavy factory EGR cooler assembly up and out of the engine compartment.
Note: Be very careful not to snag or damage any surrounding wiring, plastic sensors, or fuel lines during this process.
- Remove the remaining factory EGR cooler mounting brackets still attached to the engine block.
- Thoroughly clean all carbon, soot, and old gasket residue from the exhaust manifold flange and the intake manifold port to ensure a perfect seal.
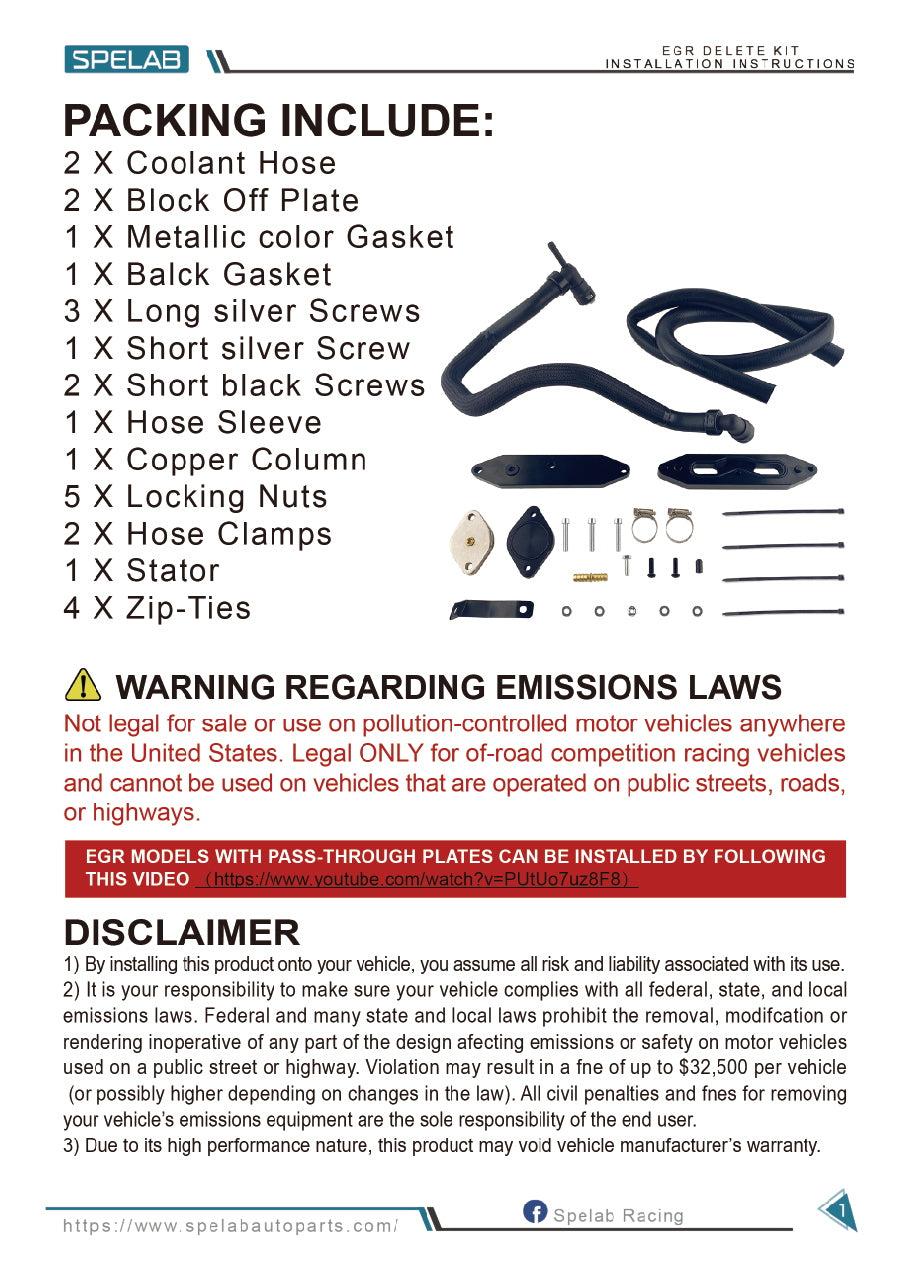
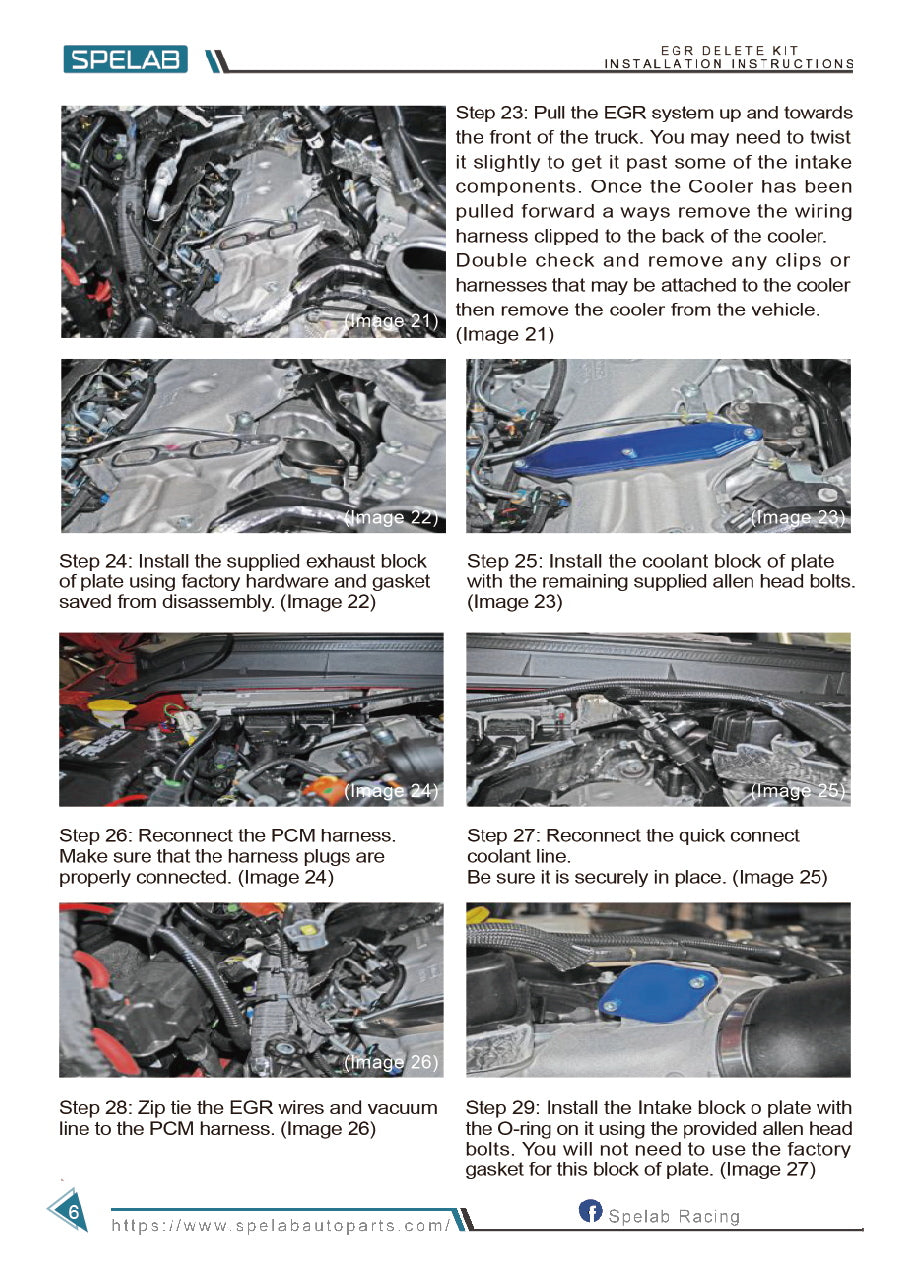
- Place the new high-temperature exhaust gasket over the exhaust manifold studs. Install the steel Exhaust Block-off Plate and secure it using the factory 13mm nuts. (Apply high-temp anti-seize to the studs and tighten evenly).
- Inspect the new Intake Block-off Plate and ensure the black O-ring is properly seated in its groove. Secure the plate to the intake manifold port using the supplied bolts and tighten evenly.
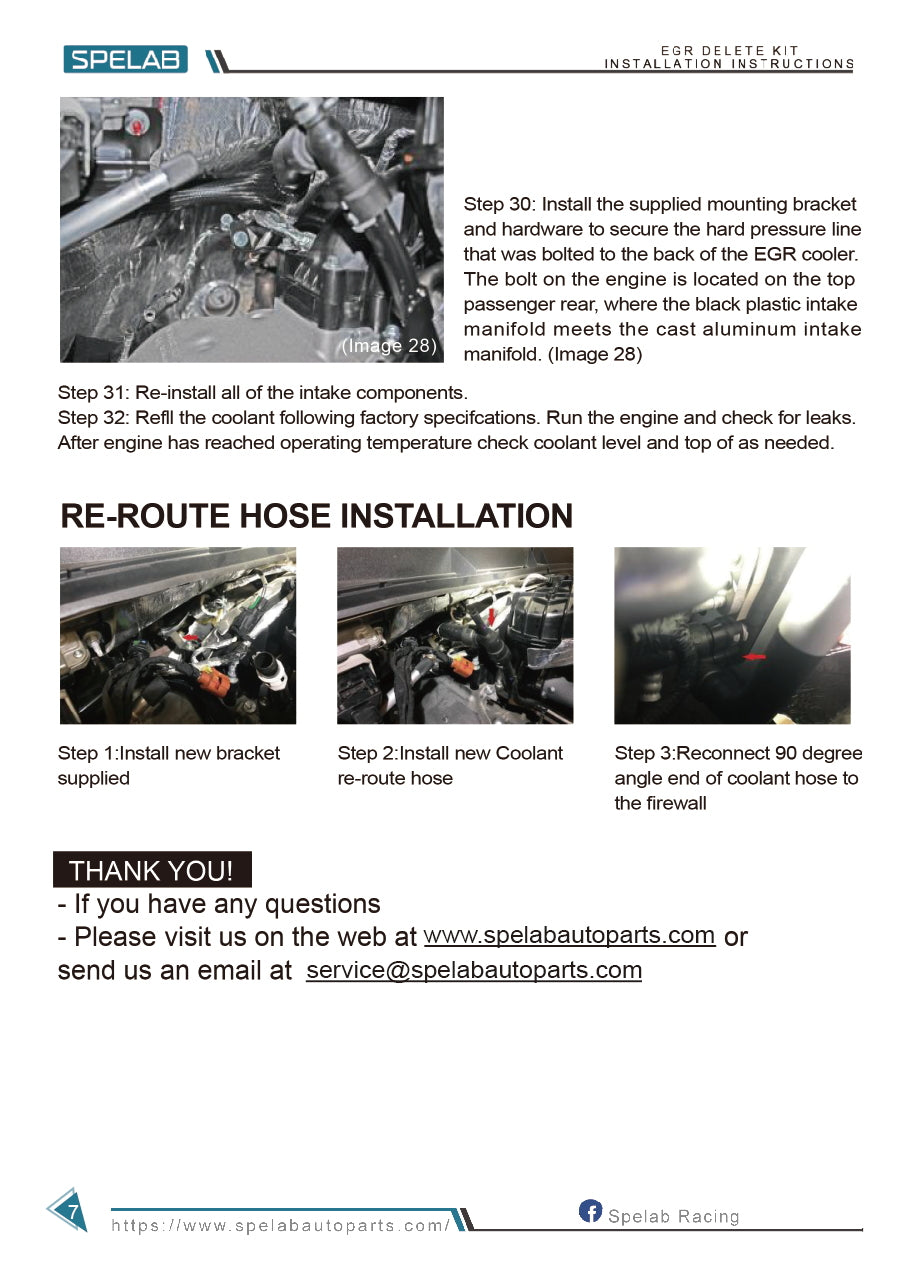
- Install the supplied aluminum coolant bypass fitting (or silicone bypass hose) to connect the two disconnected coolant lines, completing the coolant loop. Secure both ends tightly with the provided hose clamps.
- Seal the disconnected vacuum line using the provided rubber vacuum cap and secure it with a zip tie.
- Reinstall the factory EGT sensor (or the supplied brass plug if you are not retaining the sensor) into the threaded port on the exhaust block-off plate. Reconnect the electrical connector if the sensor is installed.
- Reinstall the cold-side CAC pipe. Tighten the T-bolt clamps securely (ensure they sit properly in the groove) and reconnect the sensor plug.
- Reinstall the plastic air intake tube and airbox assembly. Tighten the clamps, plug in the MAF sensor, and reconnect the CCV tube.
- Wrap all unused electrical connectors with high-quality electrical tape to seal out moisture and dirt. Use zip ties to secure them safely away from hot exhaust or moving engine parts.
- Reconnect the negative terminals on both batteries.
- Refill the secondary cooling system reservoir with the saved coolant or new approved coolant.
- CRITICAL STEP: Do not start the engine yet. Load and flash your custom EGR-delete compatible tune to the vehicle’s ECU using your tuner device.
- Once the tune is loaded, start the engine and let it idle. Carefully inspect the exhaust block-off plate for any exhaust leaks (listen for a ticking or hissing sound) and check all coolant connections for leaks. Let the engine reach operating temp, allow it to cool, and top off the coolant as needed.