
SPELAB 2007-2009 Dodge Ram 6.7L Cummins EGR Delete Kit Installation Instructions
SPELAB Company Diesel EGR Bill of Materials
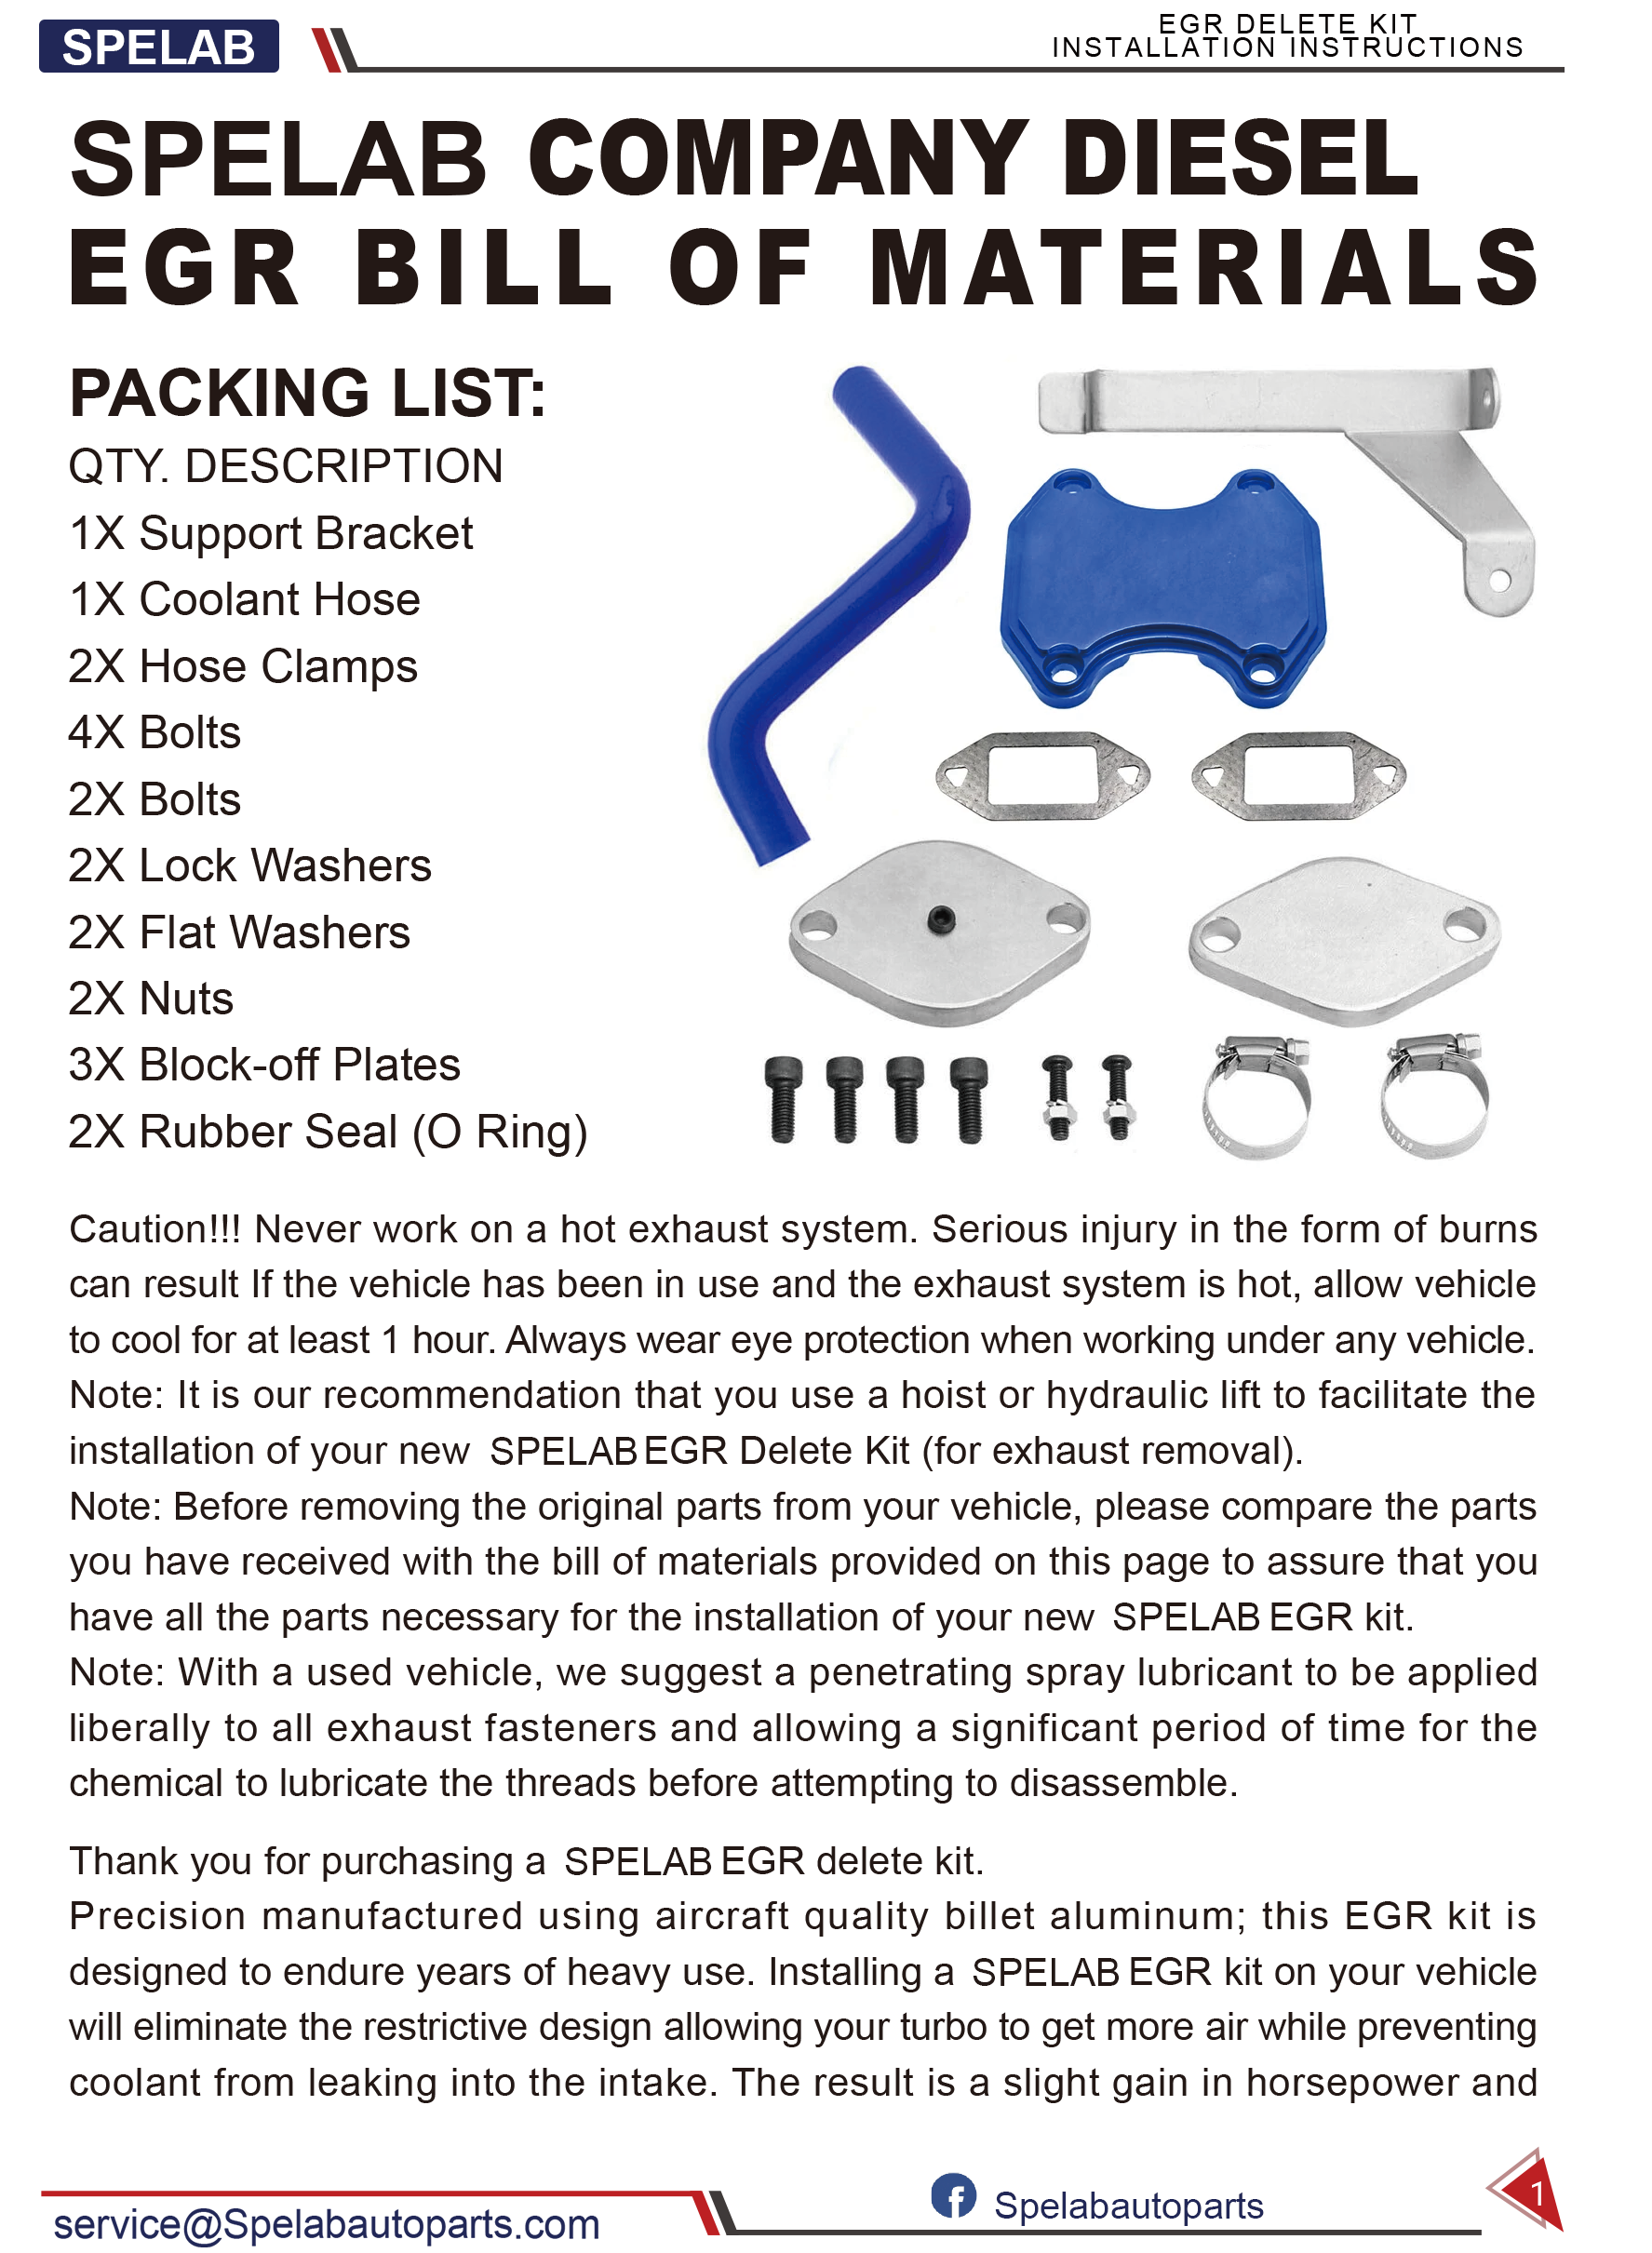
Packing List
- 1X Support Bracket
- 1X Coolant Hose
- 2X Hose Clamps
- 4X Bolts
- 2X Bolts
- 2X Lock Washers
- 2X Flat Washers
- 2X Nuts
- 3X Block-off Plates
- 2X Rubber Seal (O Ring)
Caution and Installation Notes
Caution!!! Never work on a hot exhaust system. Serious injury in the form of burns can result if the vehicle has been in use and the exhaust system is hot, allow vehicle to cool for at least 1 hour. Always wear eye protection when working under any vehicle.
Note: It is our recommendation that you use a hoist or hydraulic lift to facilitate the installation of your new SPELAB EGR Delete Kit (for exhaust removal).
Note: Before removing the original parts from your vehicle, please compare the parts you have received with the bill of materials provided on this page to assure that you have all the parts necessary for the installation of your new SPELAB EGR kit.
Note: With a used vehicle, we suggest a penetrating spray lubricant to be applied liberally to all exhaust fasteners and allowing a significant period of time for the chemical to lubricate the threads before attempting to disassemble.
Product Notice
Thank you for purchasing a SPELAB EGR delete kit. Precision manufactured using aircraft quality billet aluminum; this EGR kit is designed to endure years of heavy use. Installing a SPELAB EGR kit on your vehicle will eliminate the restrictive design allowing your turbo to get more air while preventing coolant from leaking into the intake. The result is a slight gain in horsepower and longer engine life.
These installation instructions have been written to help you in the installation of your SPELAB EGR kit. Please read it completely before installing your kit.
This Kit has been designed for: 2007-2009 Dodge 2500/3500 crew cab, long bed, short bed equipped with a 6.7L Cummins turbo diesel engine and automatic or manual transmissions.
This kit may void factory warranty please check with manufacturer.
This kit is intended for off-road use only.
SPELAB Manufacturing Company recommends that a diesel shop or professional aftermarket parts installer, who has all the necessary equipment, tools and experienced personnel needed for proper installation, should perform the installation of this system. However, if you decide to perform the installation, we recommend someone should help you. Ensure the installer uses all under car safety precautions including eye protection. Please take time to read and understand the following.
By installing your SPELAB EGR kit, you indicate that you have read this document and you agree with the terms stated below. It is the responsibility of the purchaser to follow all installation instruction guidelines and safety procedures supplied with your SPELAB EGR kit. SPELAB Manufacturing Company assumes no responsibility for damages occurring from misuse, abuse, improper installation, improper operation, lack of responsible care, or all previously stated reasons resulting from incompatibility with other manufacturer’s products and/or systems.
Original EGR System Removal
Step 1: Disconnect Batteries
Step 2: Drain Coolant
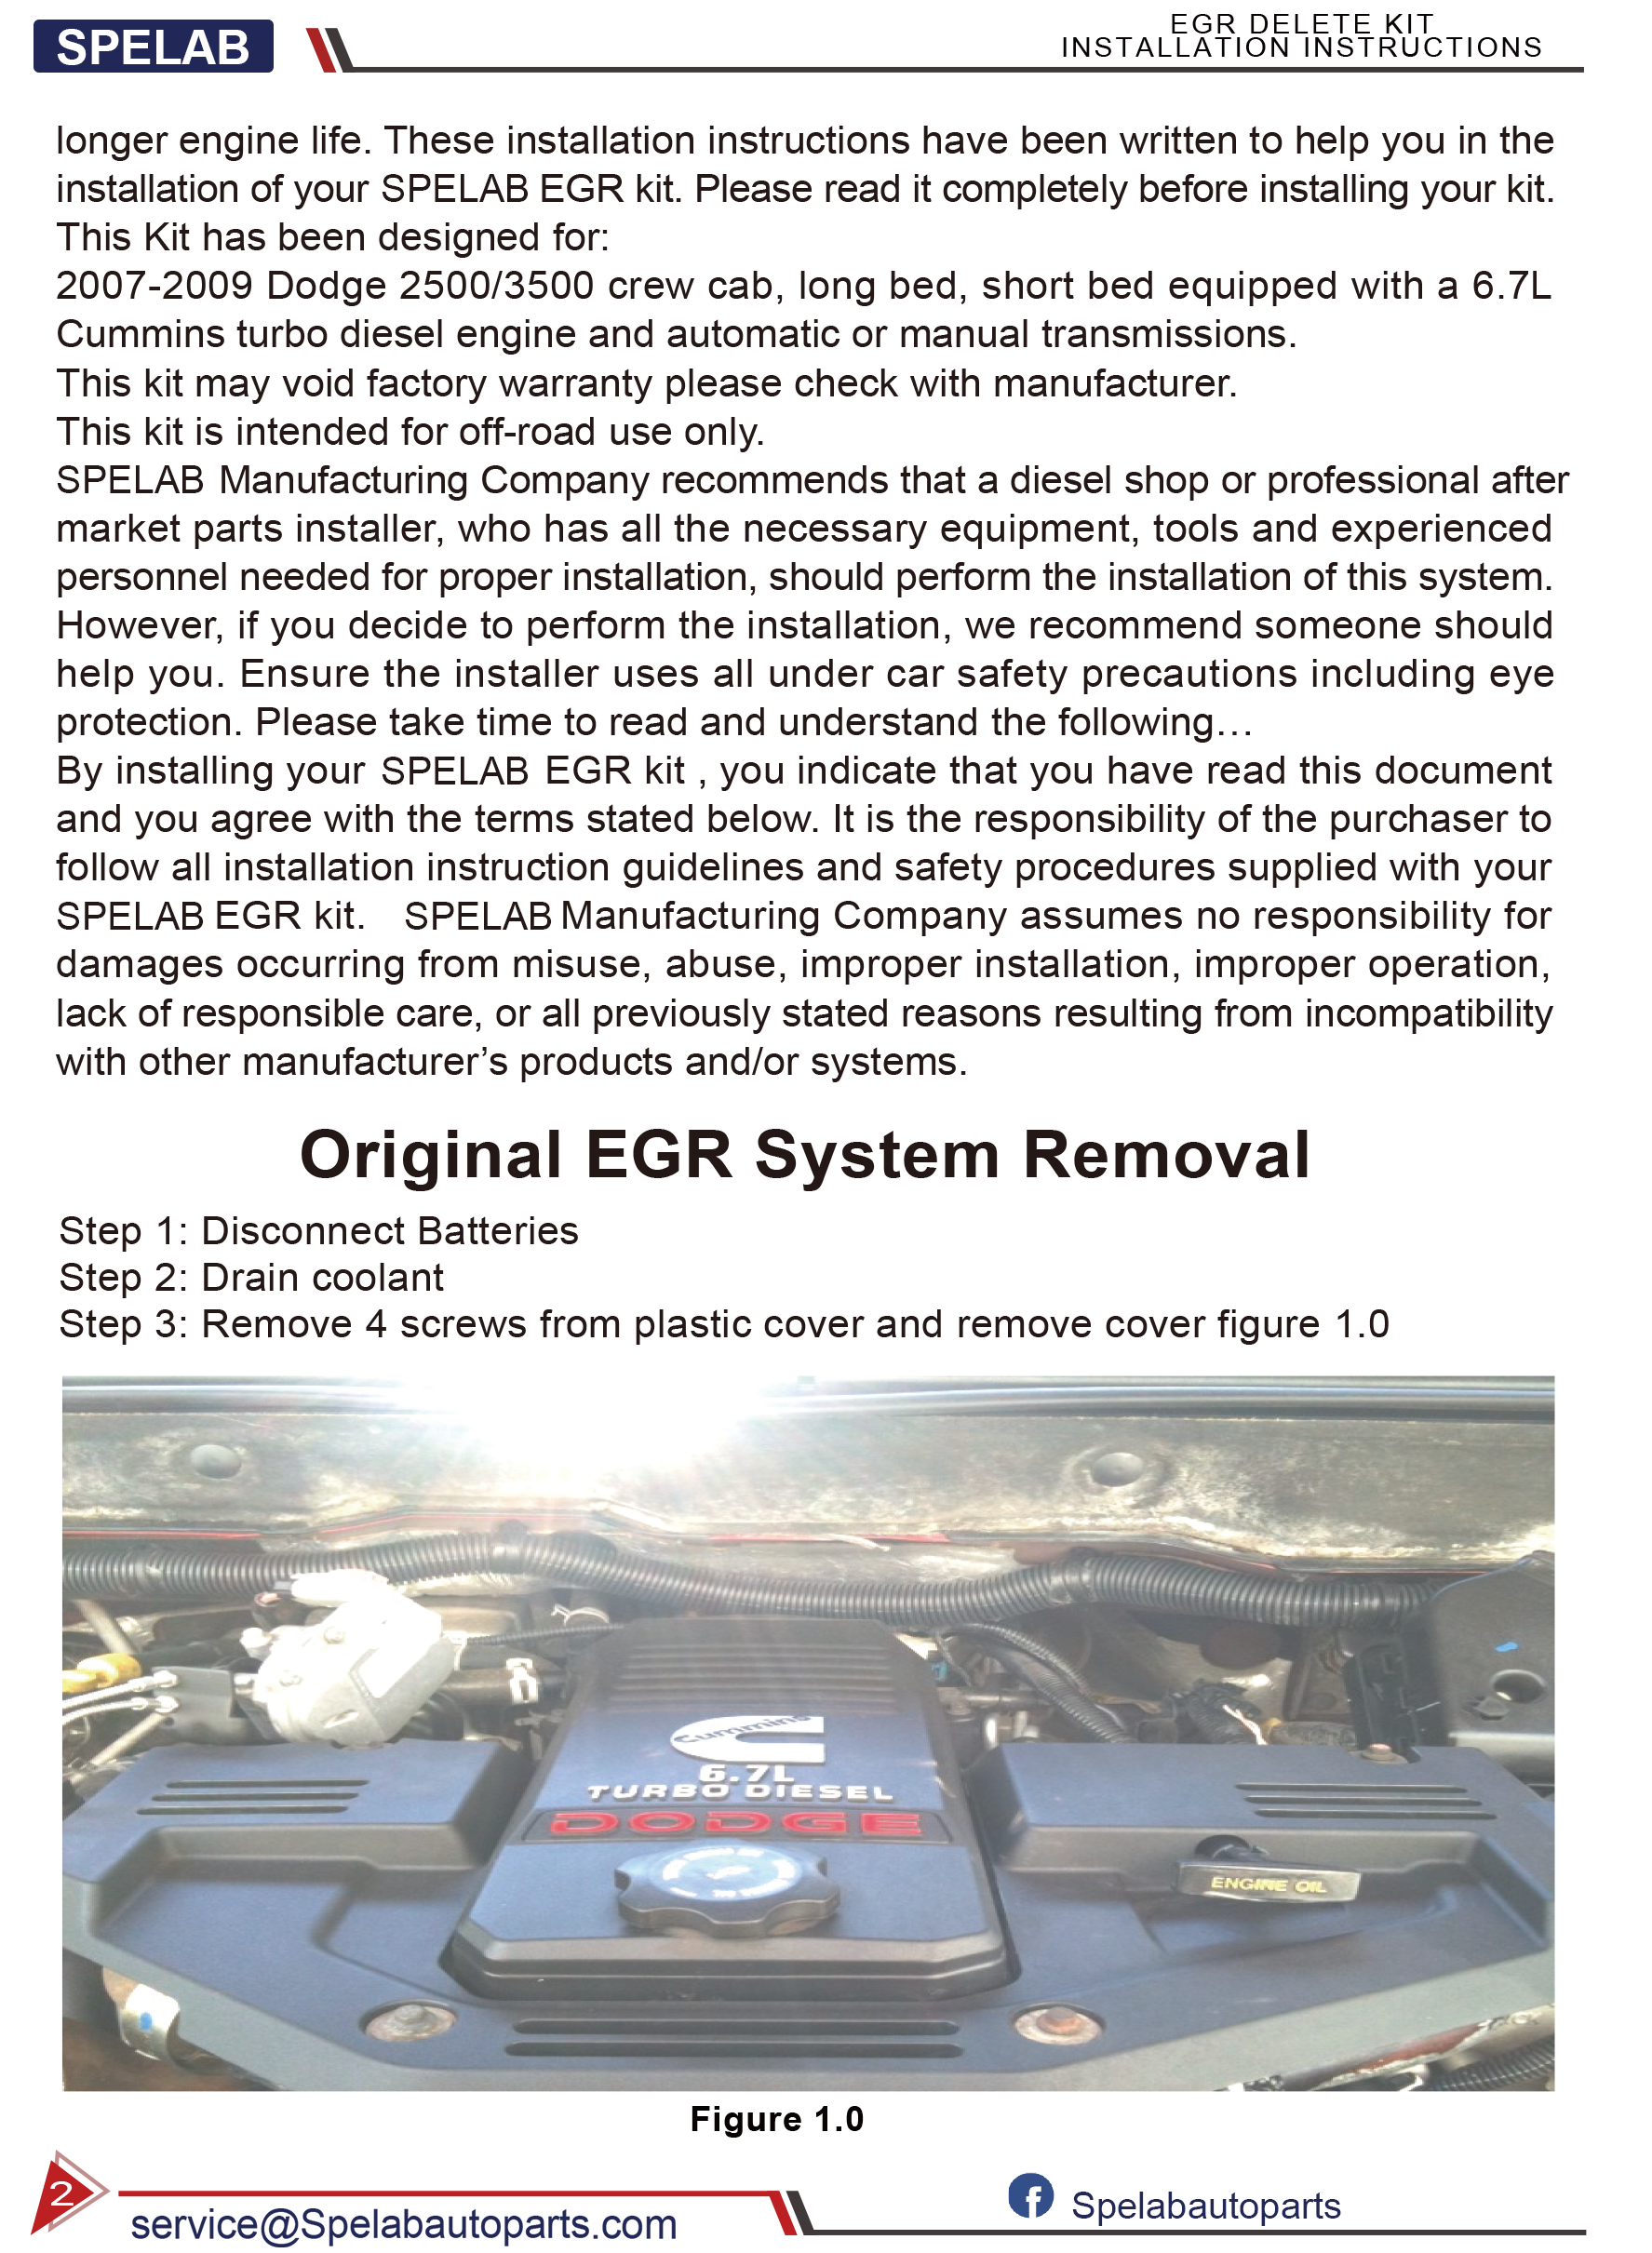
Step 3: Remove the Plastic Cover
Remove 4 screws from plastic cover and remove cover. Figure 1.0
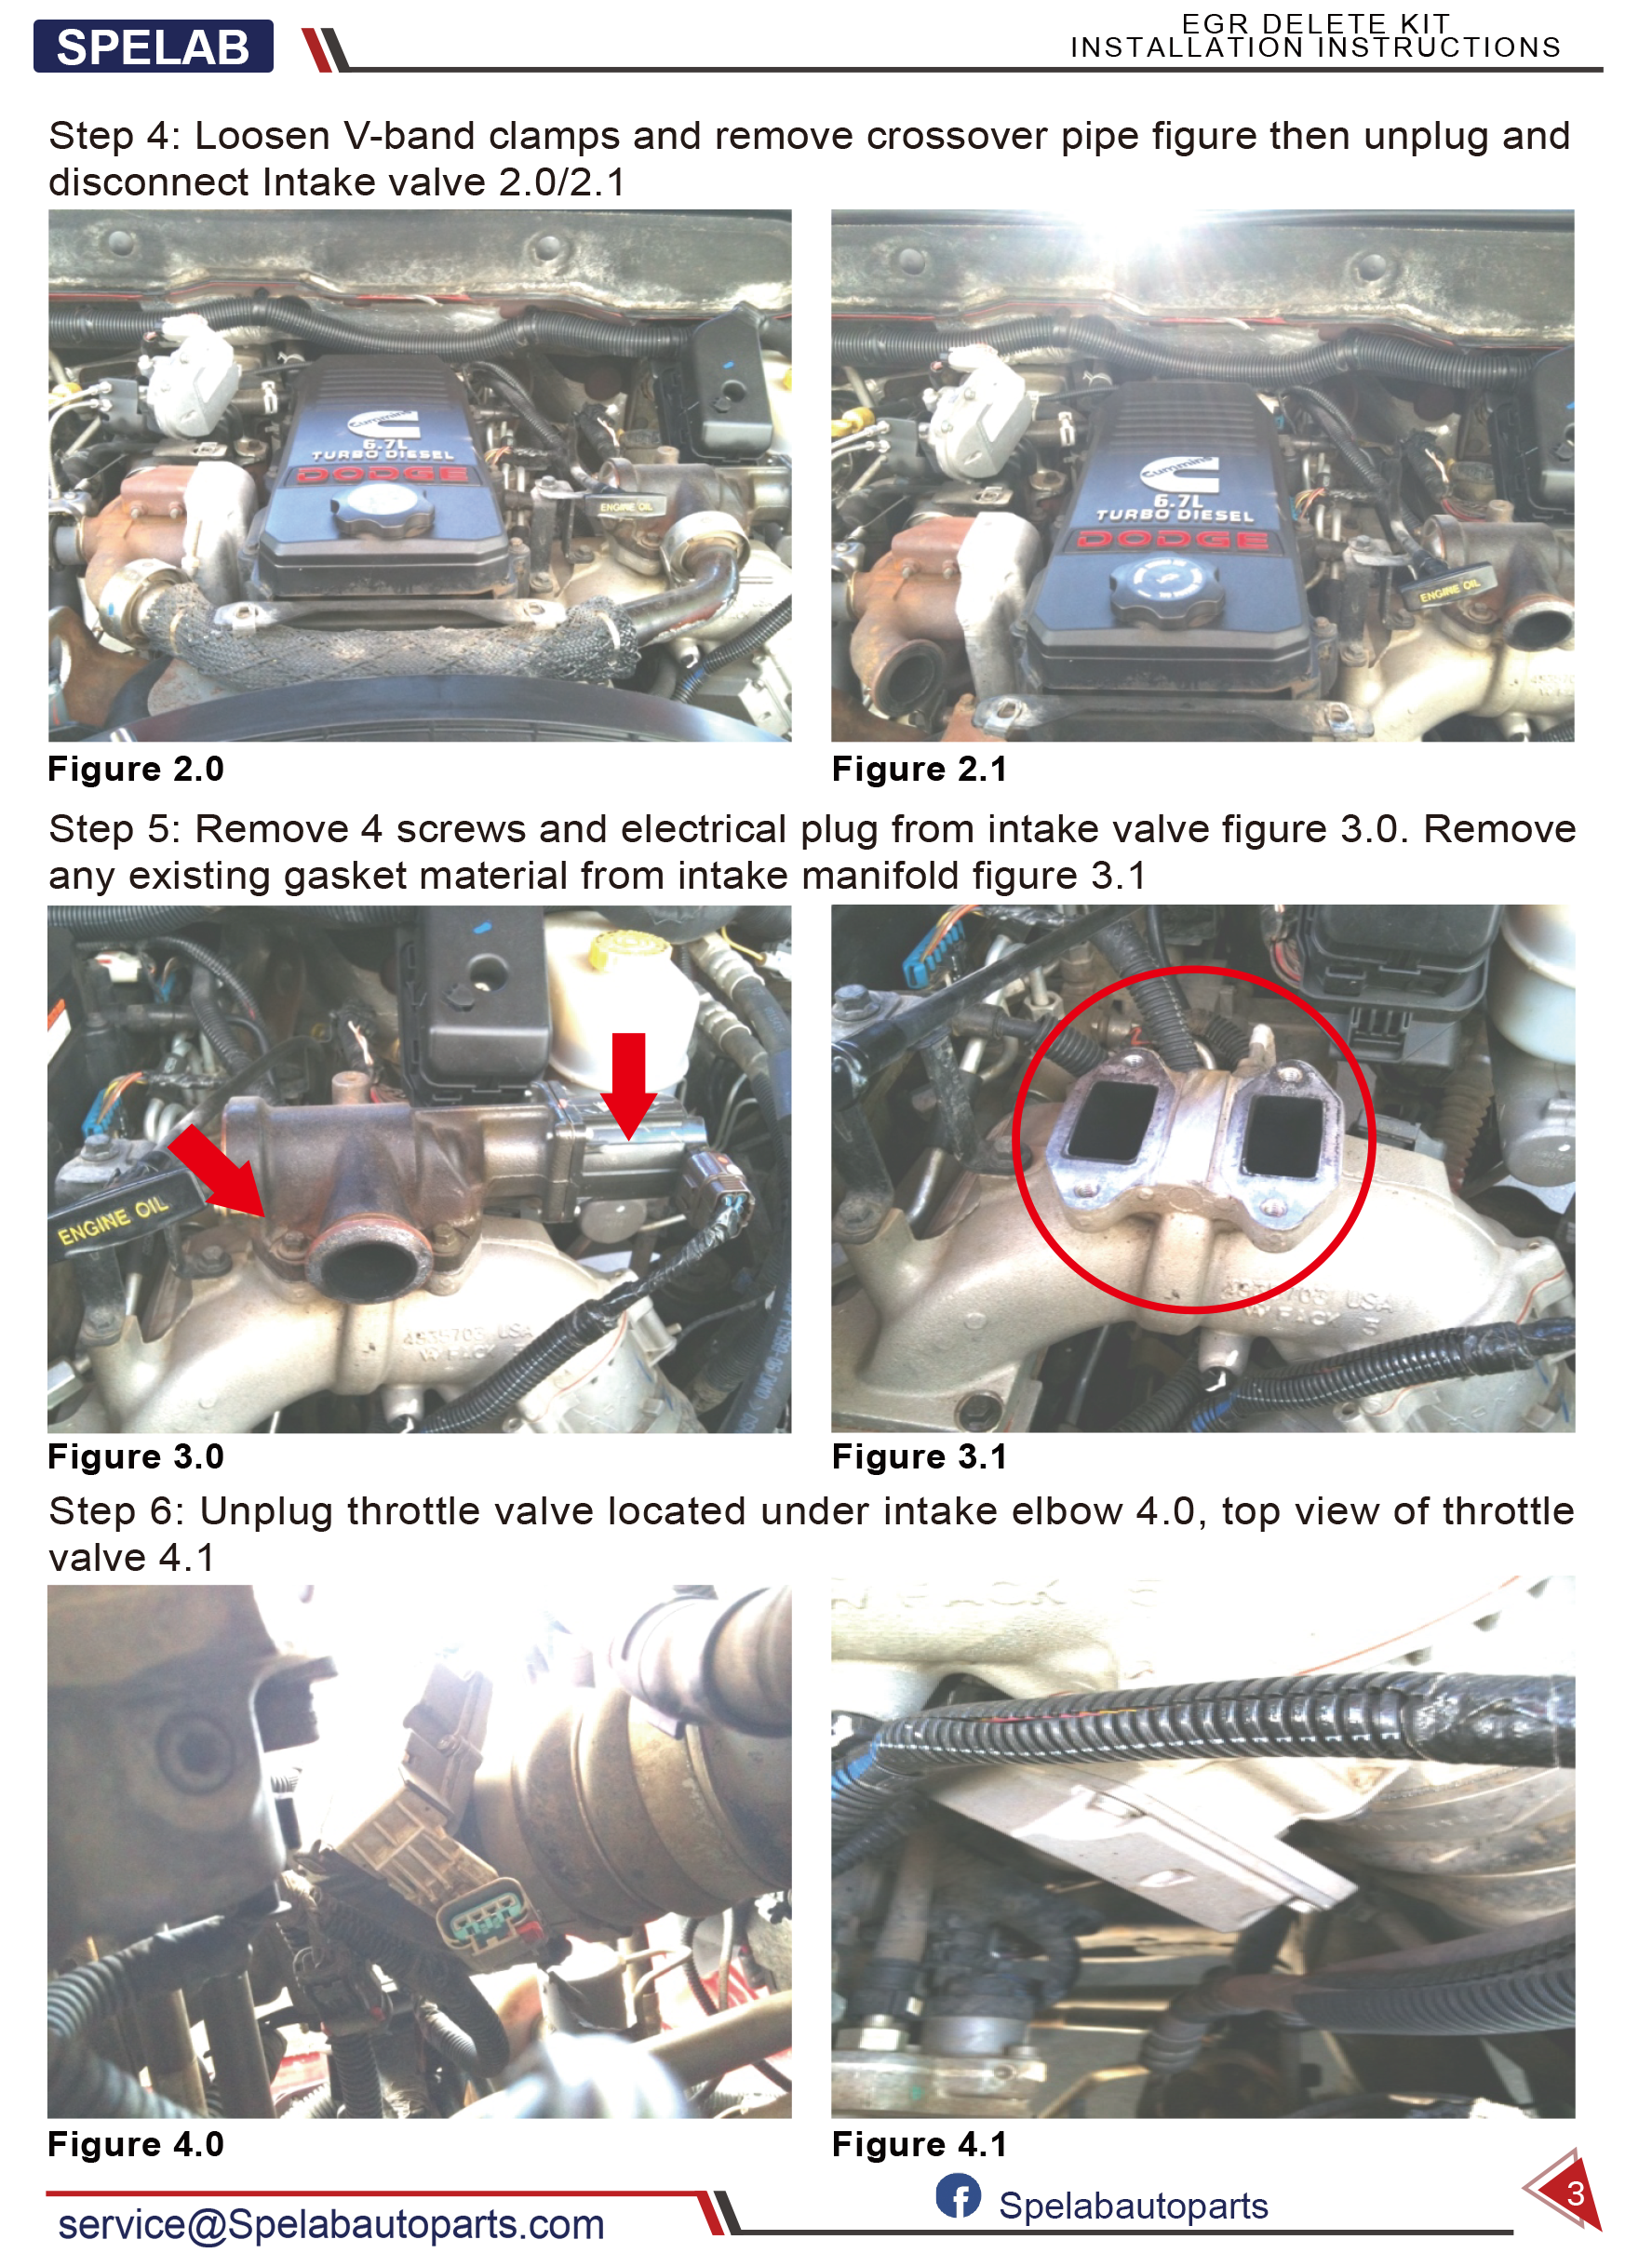
Step 4: Remove the Crossover Pipe and Disconnect Intake Valve
Loosen V-band clamps and remove crossover pipe figure then unplug and disconnect Intake valve. Figure 2.0 / 2.1
Step 5: Remove Intake Valve
Remove 4 screws and electrical plug from intake valve. Figure 3.0. Remove any existing gasket material from intake manifold. Figure 3.1
Step 6: Unplug Throttle Valve
Unplug throttle valve located under intake elbow. Figure 4.0, top view of throttle valve. Figure 4.1
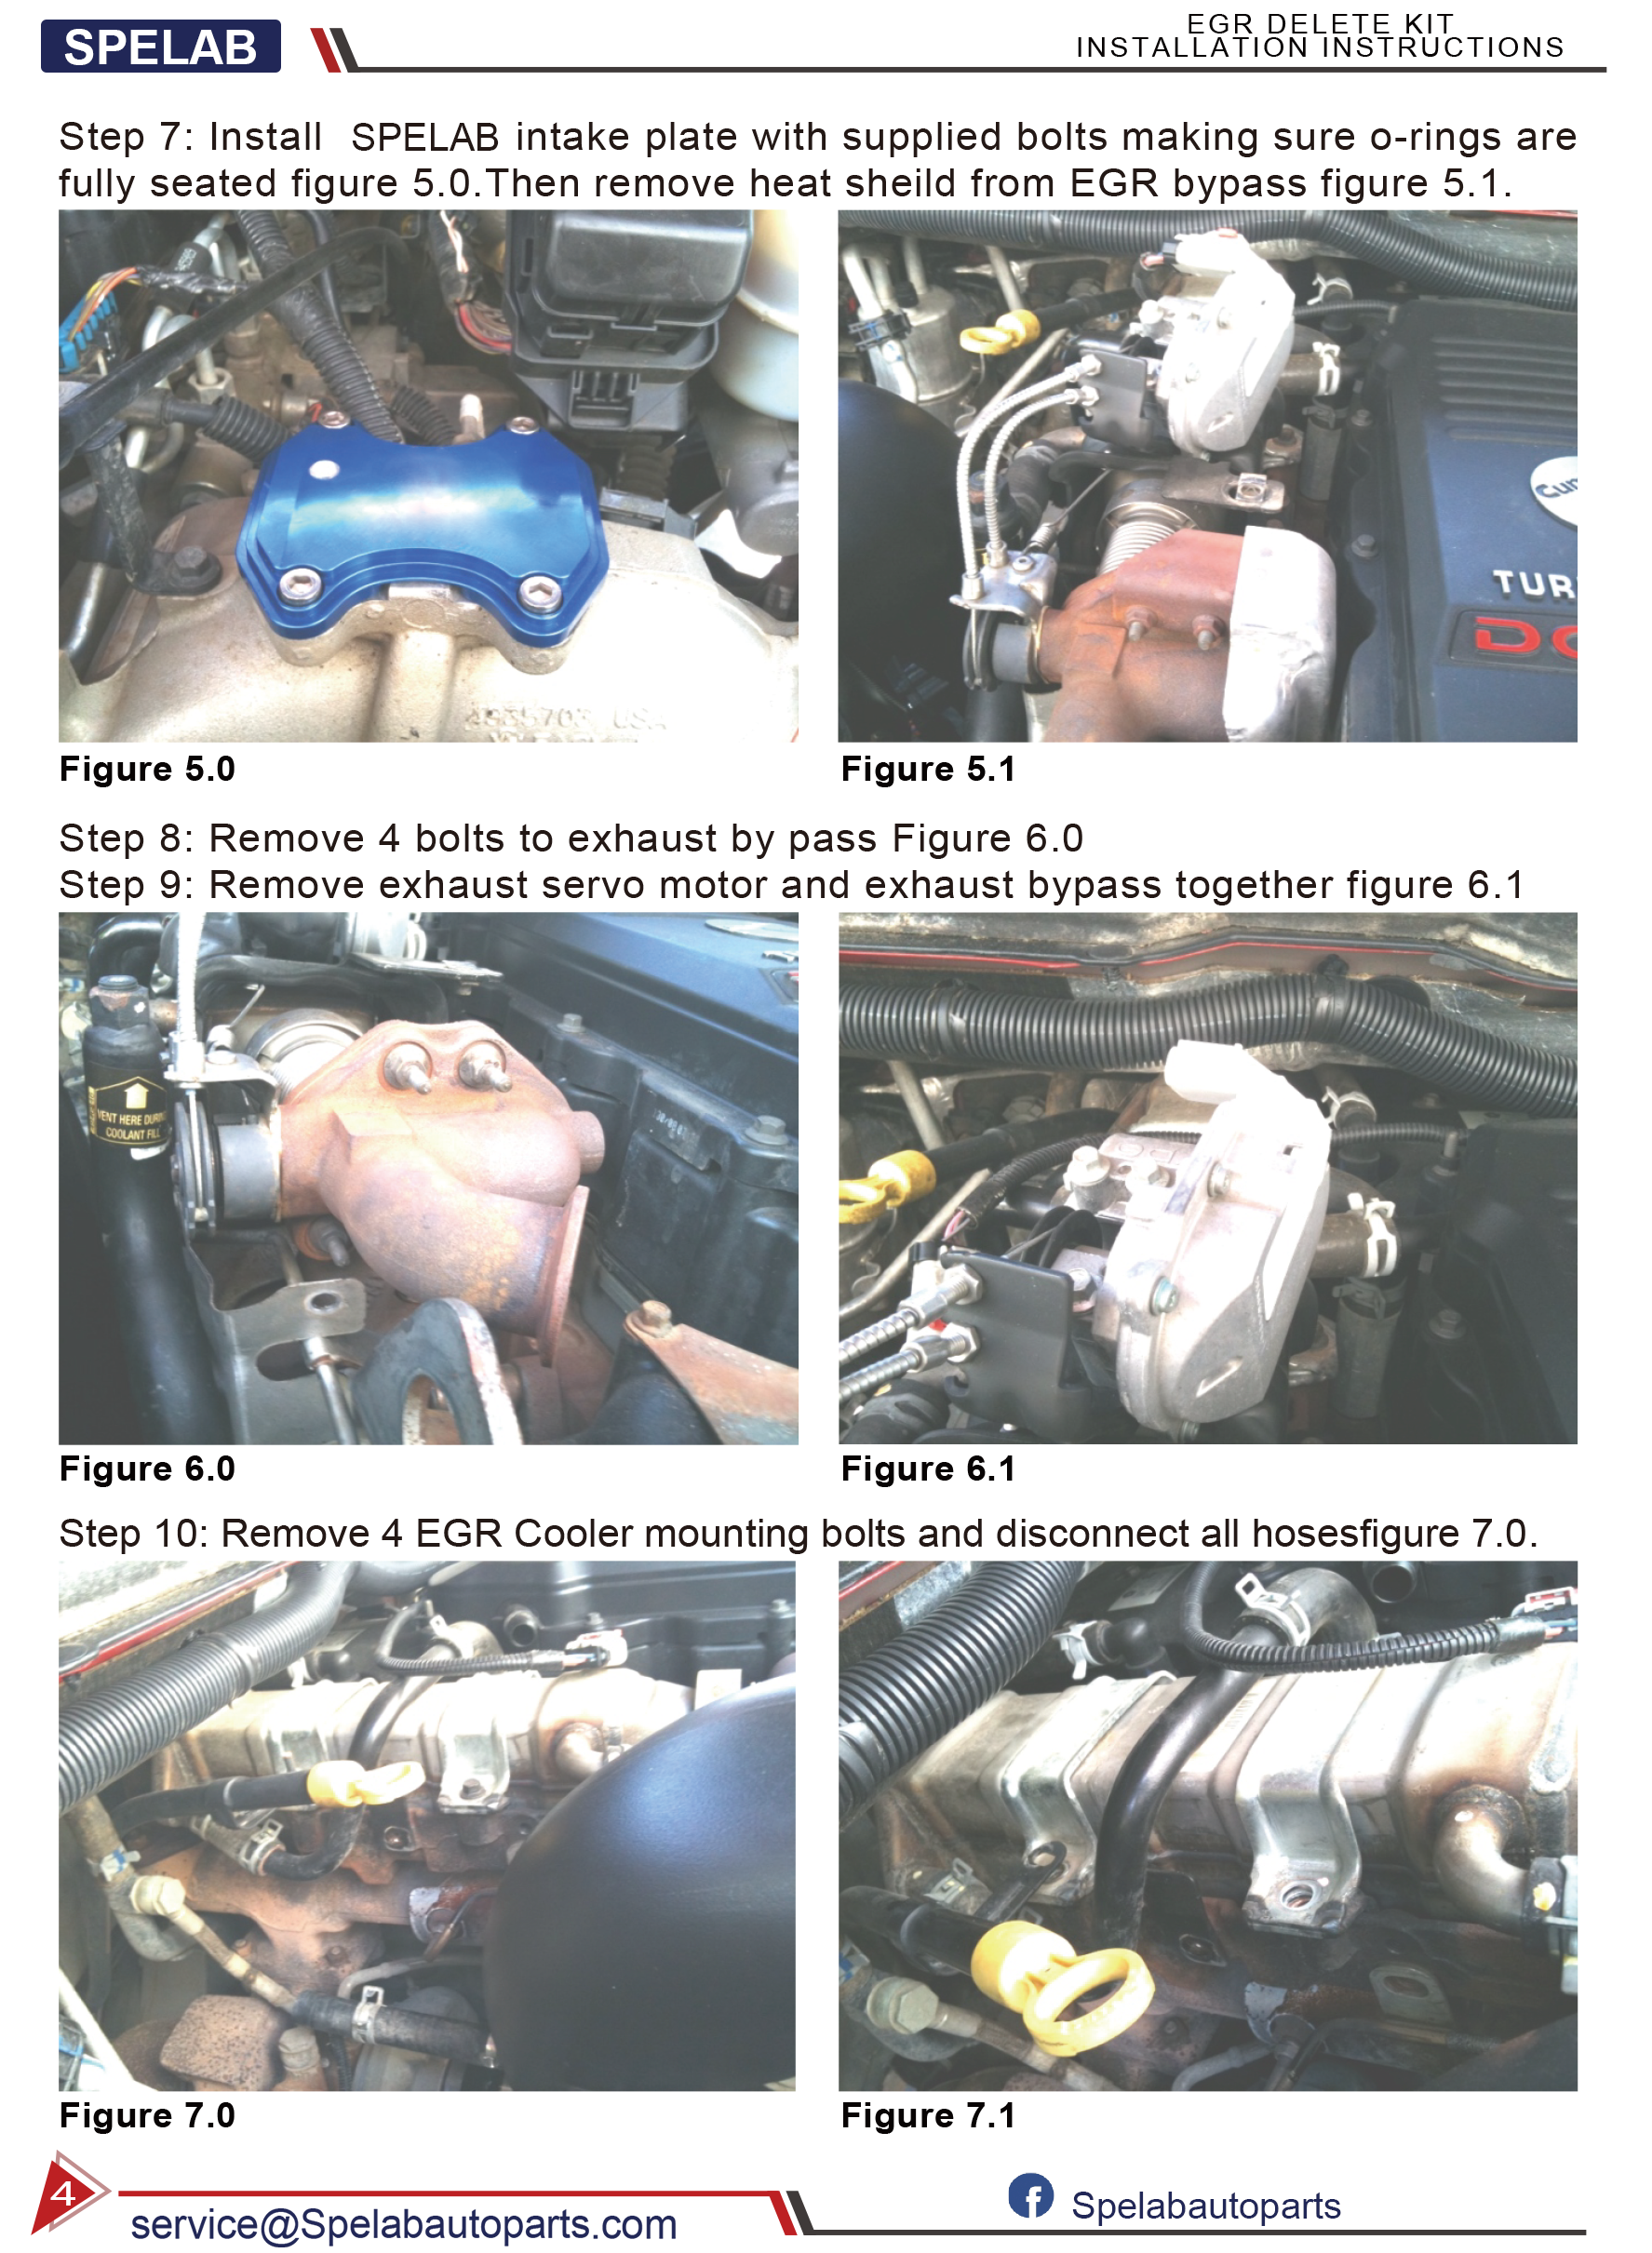
Step 7: Install SPELAB Intake Plate
Install SPELAB intake plate with supplied bolts making sure o-rings are fully seated. Figure 5.0. Then remove heat shield from EGR bypass. Figure 5.1.
Step 8: Remove Exhaust Bypass Bolts
Remove 4 bolts to exhaust bypass. Figure 6.0
Step 9: Remove Exhaust Servo Motor and Exhaust Bypass
Remove exhaust servo motor and exhaust bypass together. Figure 6.1
Step 10: Remove EGR Cooler Mounting Bolts and Disconnect Hoses
Remove 4 EGR Cooler mounting bolts and disconnect all hoses. Figure 7.0 / 7.1
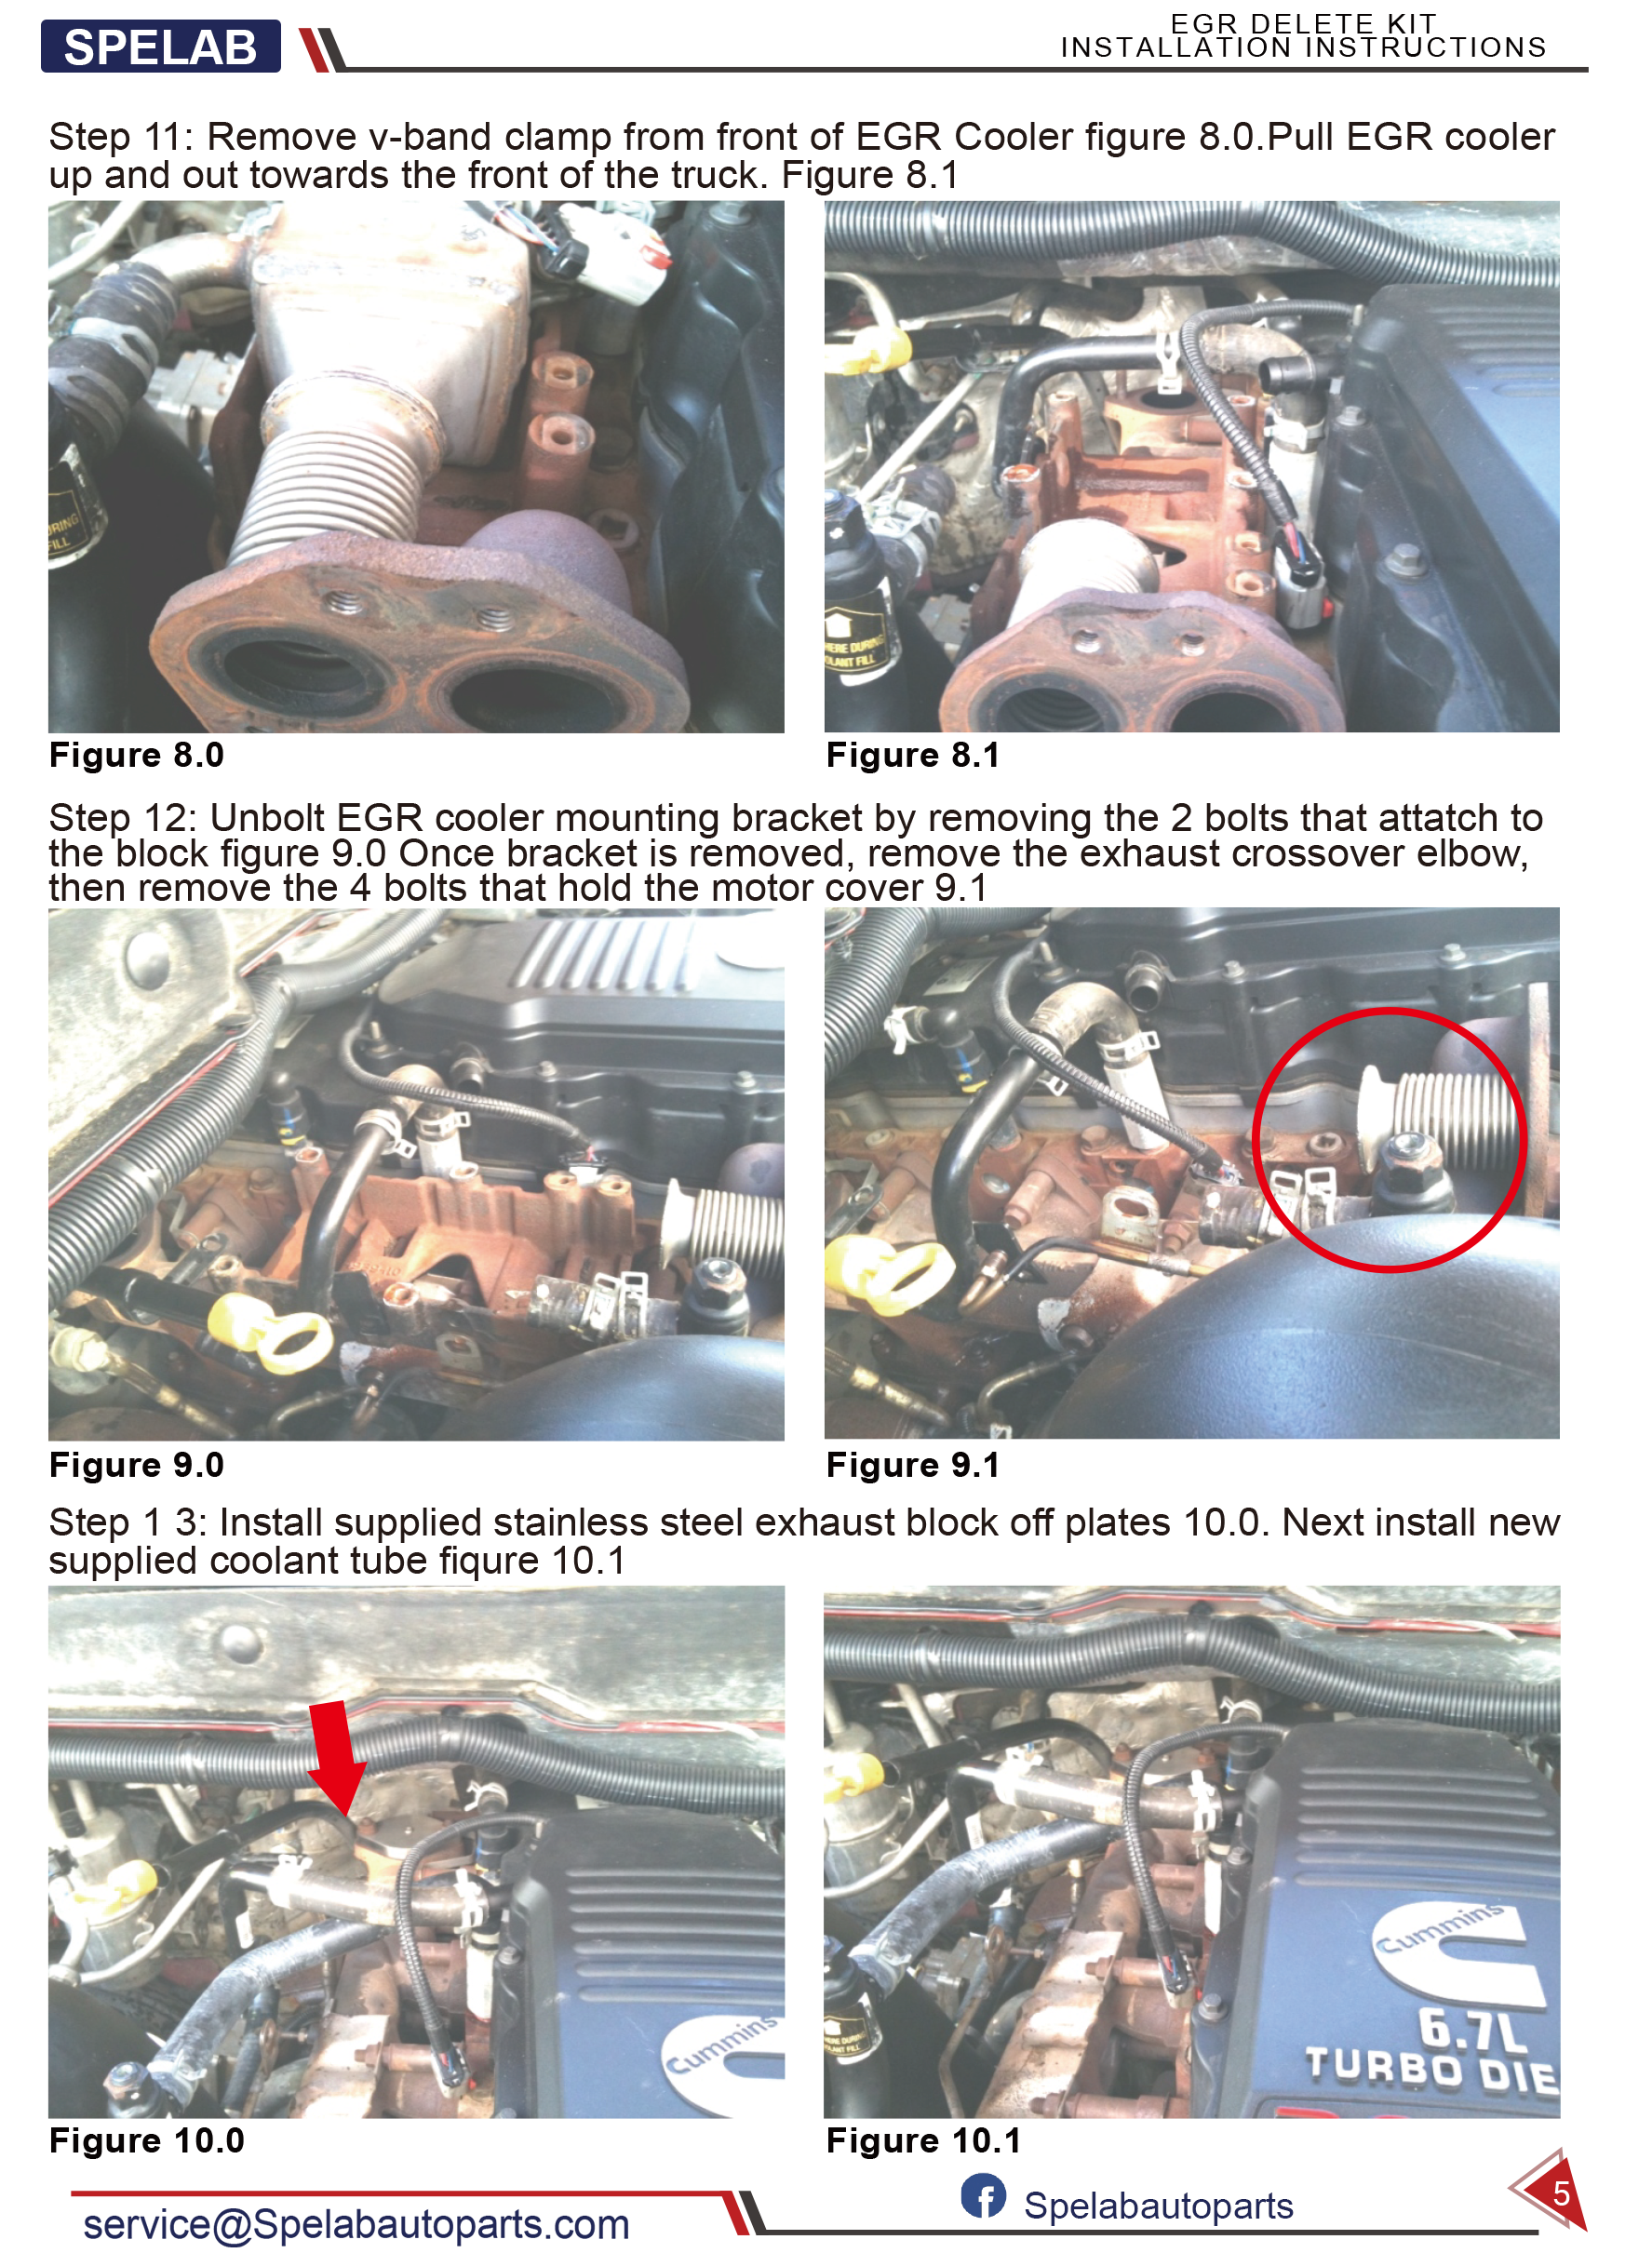
Step 11: Remove Front V-band Clamp from EGR Cooler
Remove v-band clamp from front of EGR Cooler. Figure 8.0. Pull EGR cooler up and out towards the front of the truck. Figure 8.1
Step 12: Remove EGR Cooler Mounting Bracket and Exhaust Crossover Elbow
Unbolt EGR cooler mounting bracket by removing the 2 bolts that attach to the block. Figure 9.0. Once bracket is removed, remove the exhaust crossover elbow, then remove the 4 bolts that hold the motor cover. Figure 9.1
Step 13: Install Exhaust Block-off Plates and Coolant Tube
Install supplied stainless steel exhaust block off plates. Figure 10.0. Next install new supplied coolant tube. Figure 10.1
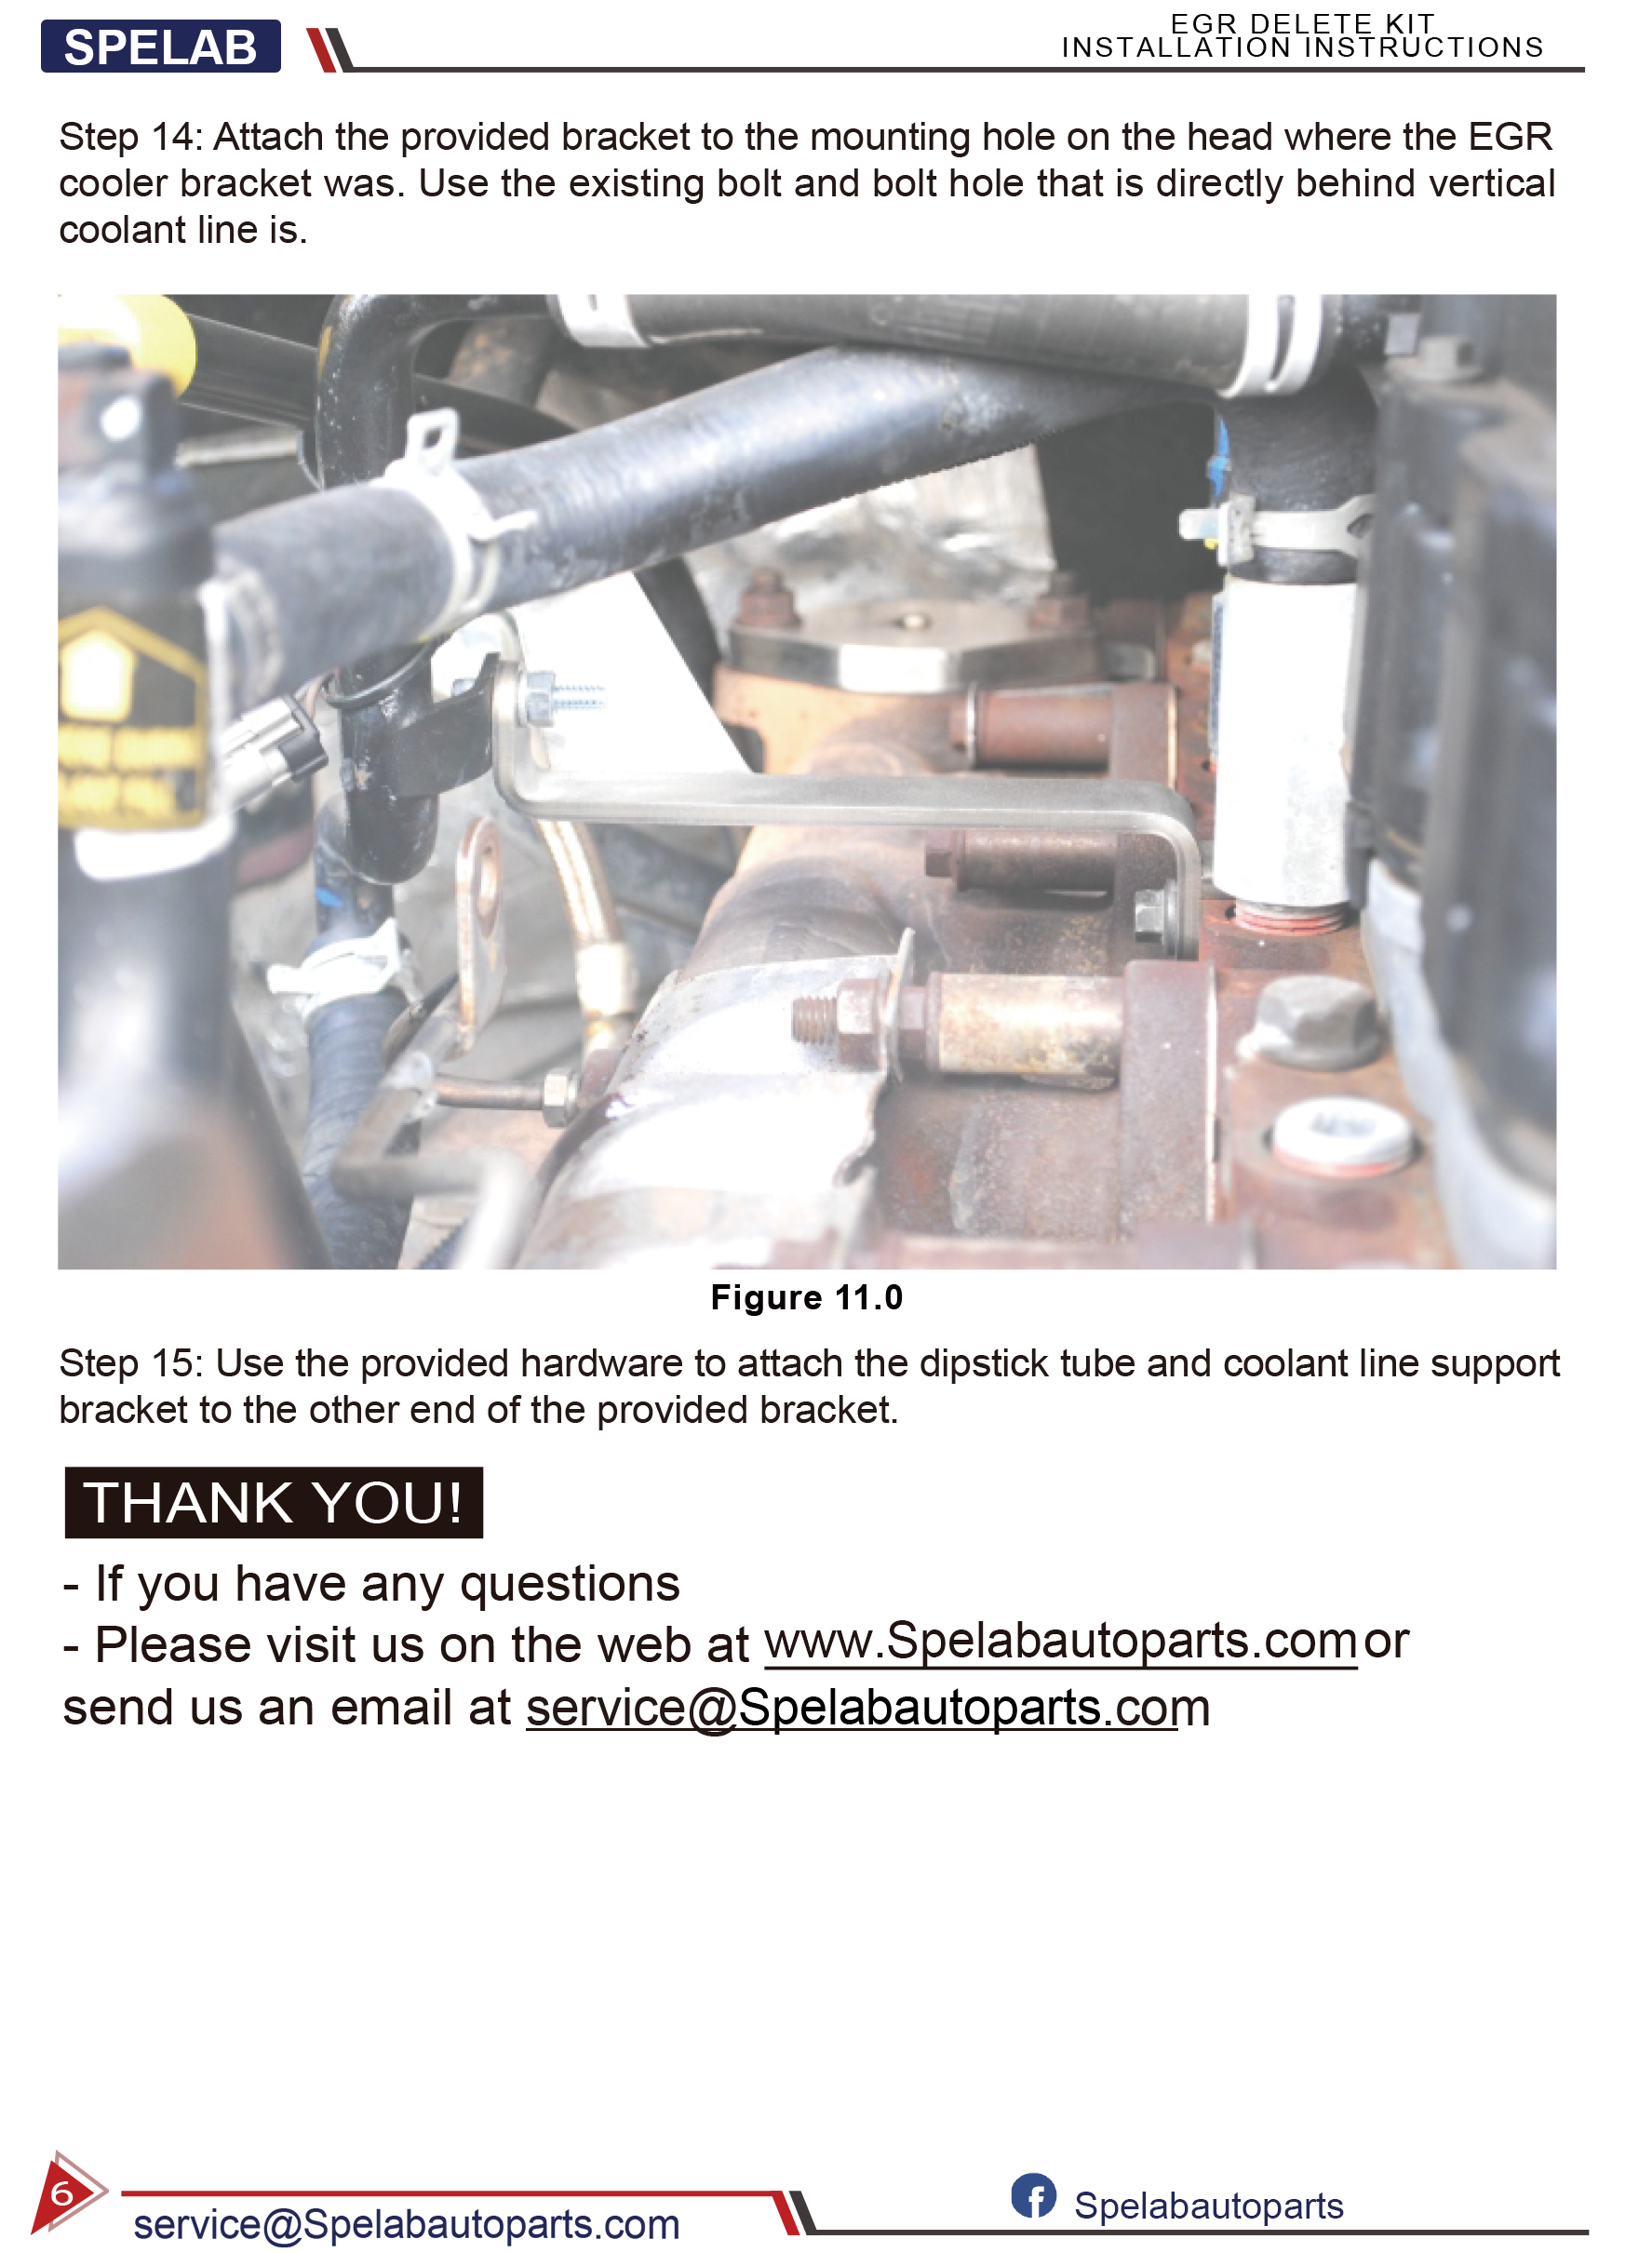
Step 14: Attach the Provided Bracket
Attach the provided bracket to the mounting hole on the head where the EGR cooler bracket was. Use the existing bolt and bolt hole that is directly behind vertical coolant line.
Step 15: Attach the Dipstick Tube and Coolant Line Support Bracket
Use the provided hardware to attach the dipstick tube and coolant line support bracket to the other end of the provided bracket.
If you have any questions, please visit us on the web at www.spelabautoparts.com or send us an email at service@spelabautoparts.com.