
🕒 Last updated: April 22, 2026
Replace the CP4 pump on a 2011–2016 6.7L Powerstroke by removing the intake manifolds and EGR cooler to access the pump, then torque the new pump to 18 ft-lbs and the gear nut to 59 ft-lbs, followed by a full fuel system flush. The two biggest DIY failure points are gear misalignment and inadequate flushing.
Introduction
The CP4 pump (Bosch CP4.2 high-pressure fuel pump) is one of the most failure-prone parts in the fuel system of 2011–2016 6.7L Powerstroke engines. When it fails, it can send metallic debris through the fuel rails and injectors, turning a pump issue into a full-system repair.
This guide walks through the replacement process step by step, including the tools you need, torque specs, common mistakes, and the flushing procedure required before startup. It applies to Ford F-250, F-350, and F-450 trucks equipped with the 6.7L Powerstroke from 2011 through 2016.
Is this job right for you? You should be comfortable removing intake components and working around diesel fuel lines. If this is your first major engine repair, a professional diesel shop may still be the safer route.
Parts & Materials Checklist
Gather everything before disassembly. Stopping mid-job to source seals or washers is how mistakes happen.
Tools Required
- 8mm and 10mm socket set with extensions
- 19mm combination wrench
- Torque wrench capable of at least 60 ft-lbs
- Fuel line disconnect tool set
- Ratchet with flex-head or compact access tools
- Compressed air and blow gun
- Drain pan and shop towels
- Smartphone or camera for hose routing and injector code photos
- Safety glasses and nitrile gloves
Step-by-Step Replacement Guide
Relieve pressure in the fuel system, then remove the coolant overflow hose, air intake duct, fuel filter housing, and transmission dipstick tube. You need clear access before moving deeper into the intake area.
Photograph hose routing, connector positions, and line paths before removing anything. Reassembly goes much faster when you have a visual record.
Common mistake: Cracking lines before pressure is relieved. Always depressurize first to avoid fuel spray and a mess in the engine bay.
Remove the upper intake manifold first. As soon as it comes off, stuff clean shop rags into the intake ports to keep bolts and debris out of the engine.
Use an 8mm socket for most upper intake bolts and a 10mm socket for the rear stud bolt. Then remove the lower intake manifold after disconnecting the return line and any remaining hoses.
Common mistake: Leaving intake ports open. One dropped fastener can turn this repair into a much larger engine teardown.
Remove the serpentine belt by rotating the tensioner, then remove the tensioner assembly and vacuum pump. The CP4 pump sits behind the vacuum pump.
Disconnect the oil fill tube, fuel temperature sensor connector, and nearby hoses or clamps. Mark connector orientation so nothing gets crossed on reassembly.
Pro tip: Mark the belt routing before removal if your factory routing sticker is faded.
Use a 19mm wrench to loosen the fuel line fittings at the rear of the CP4. Use a backup wrench to keep the pump-side fitting from twisting.
Remove the EGR cooler for working clearance. Start with the upper bracket bolts, then move to the cooler mounting hardware. Keep a drain pan ready for residual coolant.
Common mistake: Turning the pump fitting without a backup wrench. That can crack the housing or fitting and create an expensive parts problem.
Before loosening bolts, use a paint pen to mark the relationship between the CP4 drive gear and the mating gear. This alignment mark is critical.
Remove the mounting bolts and slide the pump straight back off the studs. Do not rotate it while removing it, or you can disturb the shaft alignment.
Most important mistake to avoid: Skipping the gear alignment mark. Incorrect reinstallation can lead to immediate startup issues and repeat failure.
If the old pump failed catastrophically, inspect lines and the filter for metallic debris before installing anything new. If you find contamination downstream, you may be dealing with a broader fuel-system repair.
For preventive replacement, clean the pump mounting face with a lint-free rag and a light amount of brake cleaner, then dry with compressed air. Remove all old seals and O-rings.
Photograph injector identification codes while access is good. That can save time later if injector programming is needed.
Debris check: Inspect the fuel filter and return side. If you find metal in the system, stop and address contamination before installing a new pump.
Lightly lubricate the new O-rings with clean diesel fuel, align the pump with the studs and gear mark, and slide it into place without forcing it.
Start all bolts by hand, then torque in sequence. Replace any one-time-use sealing hardware during reassembly.
| Fastener | Torque Spec | Tool | Notes |
|---|---|---|---|
| CP4 Pump Mounting Bolts (×3) | 18 ft-lbs | 13mm | Torque in a cross pattern |
| CP4 Drive Gear Nut | 59 ft-lbs | 27mm | Hold the assembly correctly while torquing |
| Fuel Line Banjo Bolts | 22 ft-lbs | 19mm | Use new copper washers |
| Lower Intake Manifold Bolts | 18 ft-lbs | 10mm | Use a star pattern |
| Upper Intake Manifold Bolts | 89 in-lbs | 8mm | Easy to overtighten |
| EGR Cooler Mounting Bolts | 18 ft-lbs | 8mm | New gaskets recommended |
Common mistake: Reusing old copper washers. They are crush seals and should be replaced to prevent leaks on first startup.
Reinstall components in reverse order: EGR cooler, lower intake manifold, upper intake manifold, vacuum pump, tensioner, belt, intake ducting, coolant lines, and dipstick tube.
Replace intake manifold gaskets and make sure every rag placed in the intake ports is removed before final assembly.
Pro tip: Work methodically and torque everything to spec. The upper intake bolts are especially easy to overtighten.
Do not skip the flush. Circulate fresh diesel through the low-pressure side to remove contamination, then install a new fuel filter.
Prime the system by cycling the ignition key on and off multiple times before cranking. Start the engine, inspect for leaks immediately, then recheck after several minutes of idle.
Pre-start checklist: New filter installed, new washers fitted, gear alignment verified, intake ports cleared, coolant refilled, and the system primed several times.
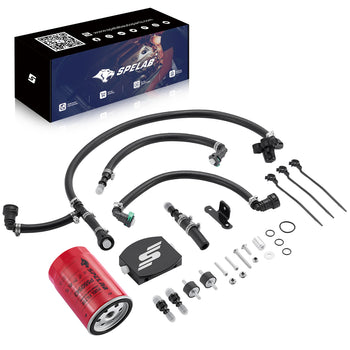
CP4 Bypass / Disaster Prevention Kit
If you are replacing a CP4, a bypass kit is worth considering. It is designed to help keep pump debris from reaching injectors and rails if the pump fails again.
Fitment: 2011–2025 6.7 Powerstroke Diesel Ford F250 / F350 / F450
Know MoreCP4 vs CP3 Conversion
One of the biggest questions after a CP4 failure is whether to install another CP4 or convert to a CP3 system instead.
| Factor | CP4.2 Replacement | CP3 Conversion Kit |
|---|---|---|
| Parts Cost | $300–$600 | $700–$1,200 |
| Install Complexity | Moderate | Moderate–High |
| Failure Risk | Moderate | Lower |
| Catastrophic Debris Risk | Yes, unless protected | Lower |
| Best For | Stock-style repair | Long-term reliability builds |
A direct CP4 replacement is typically the simpler path for a stock truck. A CP3 conversion can be attractive for owners prioritizing long-term durability, but it usually involves a broader system change.
Reference Video
Watch a full CP4 replacement walkthrough here:
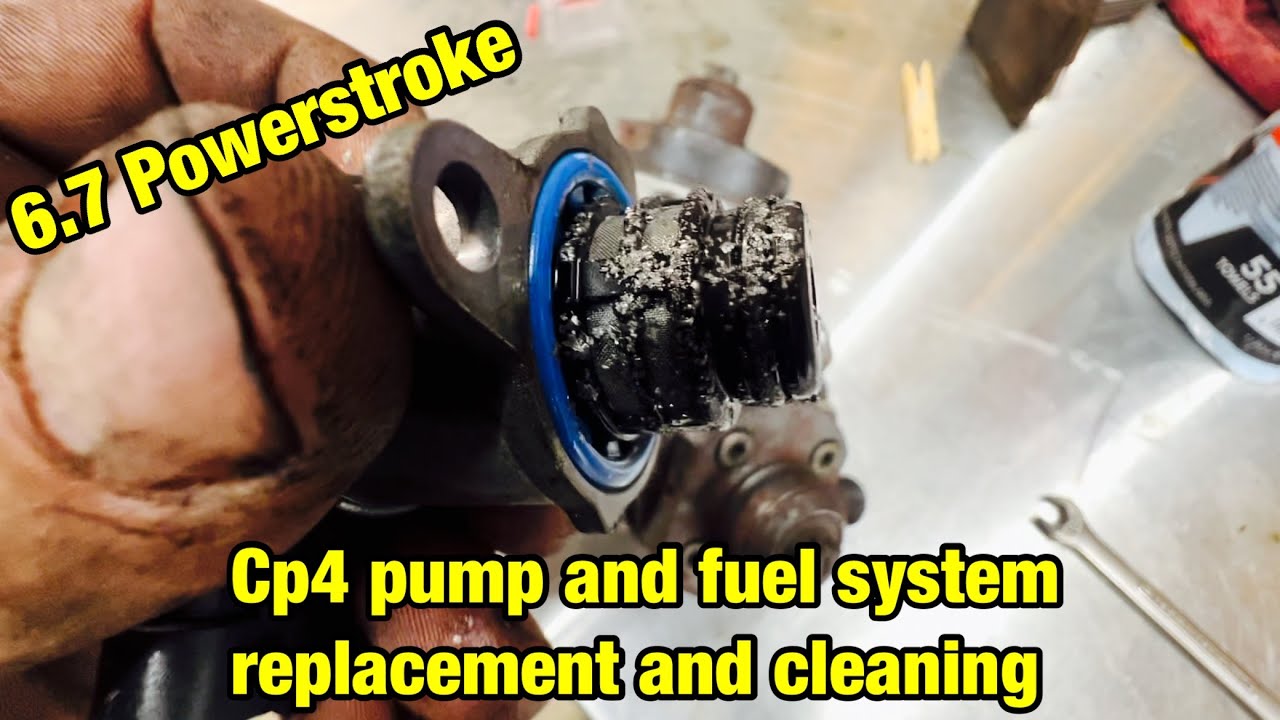
Tip: using a clickable thumbnail loads much faster than embedding a full iframe inside the article body.
Conclusion
Replacing the CP4 pump on a 2011–2016 6.7L Powerstroke is possible for an experienced DIY owner, but only if you stay disciplined on alignment, cleanliness, sealing hardware, and flushing.
The biggest failure points are predictable: poor gear alignment, reused sealing parts, and contaminated fuel left in the system before startup.
Good fuel, proper maintenance, and preventive protection are still the best way to reduce the chance of another expensive fuel-system failure.
Frequently Asked Questions
Q: What is the life expectancy of a 6.7 Powerstroke CP4?
A: The CP4.2 pump is often discussed in the 100,000–150,000 mile range, but fuel quality, lubricity, maintenance, and heat all affect lifespan.
Q: What are the symptoms of a failing CP4 on a 6.7 Powerstroke?
A: Common warning signs include hard starts, rough idle, reduced power under load, fuel-pressure-related trouble codes, and in severe cases metallic debris in the fuel system.
Q: How much does it cost to fix a 6.7 Powerstroke CP4 failure?
A: A planned DIY pump replacement is far cheaper than a catastrophic debris event. Once the rails and injectors are contaminated, repair costs can increase dramatically.
Q: How do you prevent CP4 failure on a 6.7 Power Stroke?
Use quality diesel, maintain the fuel system, replace filters on time, and consider a bypass/disaster prevention kit if you want added protection.
A: Can I replace the CP4 with a CP3 pump instead?
Yes, many owners consider a CP3 conversion for durability reasons. It is a different path than a direct CP4 swap and should be planned as a system-level change.
Read More
John Lee
Mechanical Engineer | 10+ Years Experience
John has spent the last decade engineering and testing high-performance automotive components. Specializing in drivetrain durability and thermal management across Powerstroke, Cummins, and Duramax applications, he bridges the gap between OEM limitations and aftermarket performance. His philosophy: "Factory parts are just a starting point."


