
Updated on July 6, 2026.
Getting the torque specs right is critical when installing an intake manifold on a Small Block Chevy, especially the classic Chevy 350 5.7L V8. Overtightening can crack aluminum castings, while undertightening can cause vacuum leaks, coolant leaks, oil seepage, high idle, poor drivability, and even internal oil pull-over from the lifter valley.
Quick answer: For many traditional pre-Vortec Chevy 350 12-bolt intake manifolds, cast iron intakes are commonly torqued to about 30 ft-lbs, while aluminum intake manifolds are commonly torqued to 20–25 ft-lbs. Always follow the intake manifold and gasket manufacturer’s instruction sheet if it differs from these general Chevy 350 intake manifold torque specs.
Quick Answer: Chevy 350 Intake Manifold Torque Specs
Use this table as a general reference for traditional pre-Vortec SBC 12-bolt applications. These Chevy 350 intake manifold torque specs do not automatically apply to Vortec heads, later TBI heads with angled center bolts, or an aftermarket manifold with different manufacturer instructions.
| Manifold Material | Torque Specification | Application Notes |
|---|---|---|
| Cast Iron OEM Intake | 30 ft-lbs | Common final torque for older stock-style cast iron SBC intake manifolds. |
| Aluminum Aftermarket Intake | 20–25 ft-lbs | Safer range for many aluminum performance intakes. Do not overtighten the aluminum ears or bolt bosses. |
| Bolt Size | 3/8"-16 | Common thread size for traditional small block Chevy intake manifold bolts. |
| Torque Method | 3 passes | Snug first, step up evenly, then finish at final torque in the correct sequence. |
Pre-Vortec vs TBI vs Vortec 350 Intake Bolt Pattern
Before you torque anything, make sure the intake manifold actually matches your cylinder heads. A classic pre-Vortec 12-bolt intake, a 1987–1995 TBI / center-bolt-era head, and a 1996+ Vortec head are not the same fitment problem.
| Head / Engine Style | Common Years | Intake Bolt Pattern | What Can Go Wrong |
|---|---|---|---|
| Traditional pre-Vortec SBC | Common on many 1955–1986 small block Chevy builds | Traditional 12-bolt pattern with vertical intake bolts | Most classic Chevy 350 intake manifold torque specs and 12-bolt tightening diagrams apply to this style. |
| 1987–1995 TBI / center-bolt-era SBC | Common on many late Gen I small block applications | Still 12-bolt in many cases, but the center four intake bolts may use a different angle | Do not force an early 90° vertical-bolt intake onto heads that need angled center bolts. The bolt may bind, torque reading becomes false, and the threads or aluminum bolt holes can be damaged. |
| 1996+ Vortec 350 | Common on L31 Vortec truck engines | Different 8-bolt Vortec intake pattern | A traditional 12-bolt pre-Vortec intake will not bolt on correctly. Use a Vortec-specific intake. |
Chevy 350 Intake Manifold 12-Bolt Tightening Sequence
Why center-out?
Tightening from the middle outward helps flatten the gasket evenly, reduces manifold distortion, and helps prevent lifted corners that cause vacuum leaks, coolant leaks, or oil pull-over from the lifter valley.
3-pass torque method
- Pass 1: Snug / 8–10 ft-lbs
- Pass 2: 15–18 ft-lbs
- Pass 3: Final torque from the table above
Aluminum Intake Thermal Creep: The Hidden Oil-Burning Problem
One of the nastier Chevy 350 intake failures does not always show up as an external leak. When an aluminum manifold is clamped to cast iron heads, the two metals expand and contract differently. After several heat cycles, bolt preload can relax. If the center area loses clamp load, the intake gasket can leak inward toward the lifter valley.
| What Happens | Driver Symptom | What to Check |
|---|---|---|
| Center bolts lose preload after heat cycles | Idle quality changes after the first few drives. | Recheck torque cold if recommended by the gasket or manifold maker. |
| Intake gasket opens toward lifter valley | Blue smoke, oily intake runners, fouled plugs, or detonation under throttle. | Inspect intake ports, plugs, PCV routing, and gasket sealing surfaces. |
| Vacuum pulls oil mist into intake ports | No obvious external oil leak, but oil consumption increases. | Look for oil residue inside runners and wet plug deposits. |
| Gasket gets crushed or shifted from uneven torque | Vacuum leak, coolant seep, oil pull-over, or high idle. | Verify gasket alignment, bolt sequence, and final torque. |
If a fresh intake job causes a high idle, lean code, or unstable vacuum, this guide on diagnostic trouble codes can help separate vacuum leaks from sensor and fuel issues.
Step-by-Step Chevy 350 Intake Manifold Installation Tips
- Mark the distributor before removal. On many Chevy 350 intake jobs, the distributor must come out. Mark the distributor body, rotor position, and intake/block reference point before pulling it so ignition timing is easier to restore.
- Clean the surfaces completely. Remove old gasket material from the cylinder heads and intake manifold. Do not gouge aluminum surfaces with a hard metal scraper.
- Dry-fit the intake first. Set the manifold in place without RTV to confirm bolt alignment, port alignment, distributor clearance, and center-bolt angle.
- Check gasket alignment. Make sure the intake gaskets sit correctly around the coolant ports and intake runners. A shifted gasket can cause a coolant leak, vacuum leak, or oil pull-over.
- Throw away the cork end seals when appropriate. The cork or rubber end seals for the front and rear block rails, often called the China walls, are prone to squeezing out. Many builders use a thick 1/4-inch bead of RTV silicone instead.
- Add extra RTV at the four corner joints. The corners where the intake gasket meets the front and rear RTV rails are common leak points. A small extra dab at each corner helps seal the transition.
- Use thread sealer where required. Some SBC intake bolt holes may open into oil or coolant-adjacent passages depending on head, block, and manifold configuration. Use PTFE thread sealer where the service manual, gasket maker, or manifold instructions call for it. Use clean 3/8"-16 intake bolts and wide flat washers on aluminum manifolds when the manufacturer recommends them.
- Tighten in three passes. Do not jump straight to 25 or 30 ft-lbs. Follow the sequence and step the torque up evenly.
- Recheck after heat cycles if recommended. Let the engine reach operating temperature, cool completely, then recheck the bolts in sequence. For aluminum intakes on cast iron heads, many builders check after the first heat cycle and again after a few drive cycles.
Common Mistakes That Cause Vacuum, Coolant, or Oil Leaks
Most Chevy 350 intake manifold problems after installation come from sealing, alignment, bolt angle, or torque mistakes—not from the intake manifold itself.
| Symptom After Install | Likely Cause | What to Check |
|---|---|---|
| High idle or lean idle | Vacuum leak at intake runner, carb base, vacuum port, or gasket edge. | Check intake gasket alignment, carburetor base gasket, capped ports, and vacuum hose routing. |
| Coolant leak at intake corners | Thin RTV bead, shifted gasket, dirty surface, or uneven torque. | Inspect the front and rear corner joints and coolant port areas. |
| Oil seep at front or rear China wall | Cork end seal squeezed out or RTV bead too thin. | Use a proper RTV bead and allow the sealant to skin over as directed. |
| Blue smoke with no external leak | Internal intake gasket leak pulling oil from the lifter valley. | Check spark plugs, intake runners, PCV routing, and center intake bolt preload. |
| Rough running after distributor reinstall | Distributor dropped in one tooth off or timing not reset. | Recheck rotor position, firing order, and ignition timing. |
| Bolt torque feels inconsistent | Dirty threads, wet bolt holes, wrong bolt length, angled bolt mismatch, or lack of washers on aluminum. | Clean threads, verify bolt length, confirm head style, and apply thread sealer only where required. |
| Coolant in lifter valley | Coolant port sealing failure or intake gasket shifted during installation. | Stop and inspect before running the engine further. |
Single Plane vs Dual Plane Intake Manifold for a Chevy 350
Once you know the correct Chevy 350 intake manifold torque specs and bolt pattern, the next question is whether the engine needs a single-plane or dual-plane intake. The wrong choice can make a street engine feel lazy or choke a high-RPM build.
| Intake Type | Best For | Driving Feel | Watch Out For |
|---|---|---|---|
| Dual-plane intake | Street cars, cruisers, mild cam Chevy 350 builds, towing-style low-end torque. | Better low-end and midrange response. | May limit airflow on aggressive high-RPM builds. |
| Single-plane intake | Modified SBC 350 engines, drag racing, high-RPM use, bigger cam and carb setups. | Stronger upper-RPM airflow. | Can feel soft at low RPM on a mild street engine. |
For more context on high-RPM airflow behavior, compare how different plenum and runner designs change the way a V8 breathes at low RPM versus upper RPM.
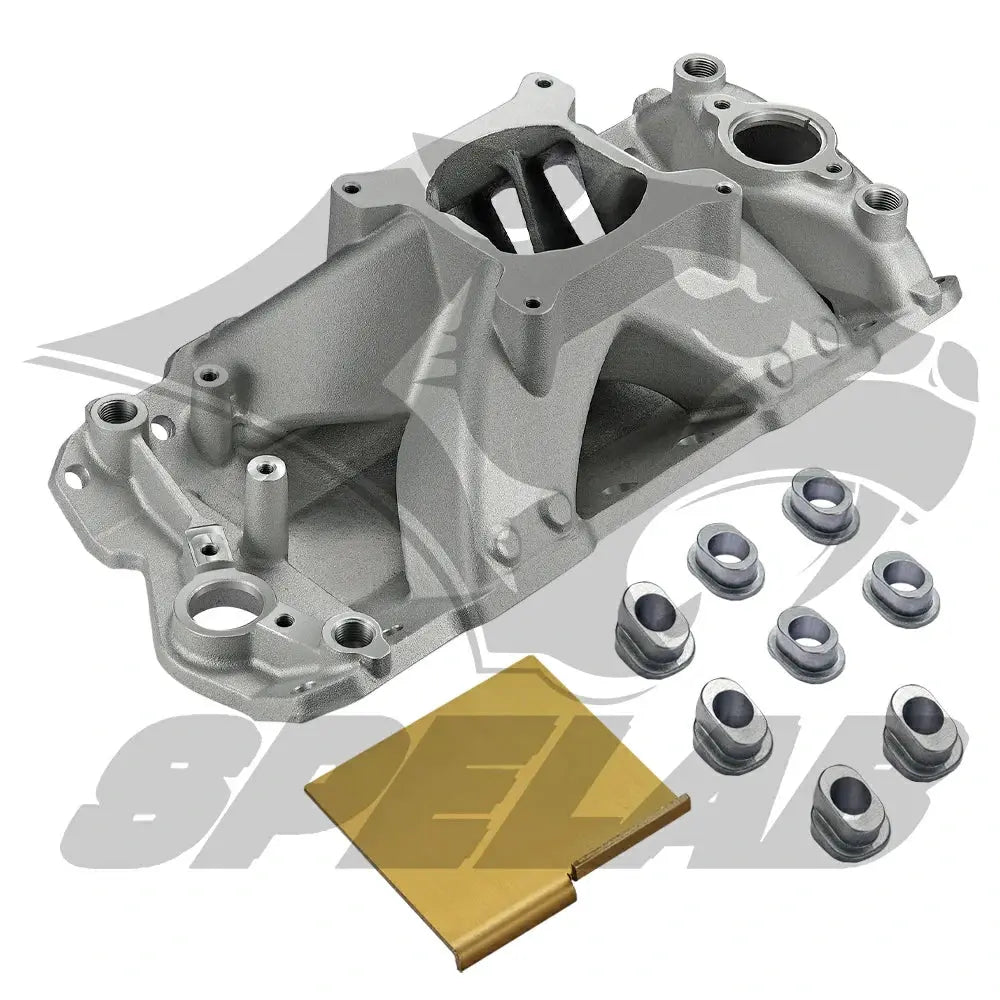
High-Rise Single-Plane for Chevy 350
RPM Range: 3,000–7,500+ RPM
Designed for modified SBC 350 engines that need high-RPM airflow. Best for drag racing, aggressive cams, and performance builds that live above street-cruise RPM.
Shop 350 Single-Plane >Dual-Plane Aluminum Intake for Chevy 350
Best Use: Street cruiser, mild cam, low-end torque, throttle response.
A dual-plane intake is usually the smarter choice for a mostly street-driven Chevy 350 that needs clean idle, crisp throttle response, and usable torque below racing RPM.
Shop 350 Dual-Plane >Airflow Upgrade Tip: Intake and Exhaust Should Match
An intake manifold upgrade helps the engine breathe on the intake side, but the exhaust side still matters. If the engine is being built for more RPM or better airflow, matching the intake with Chevy Exhaust Headers can help reduce restriction after the combustion event.
For a broad classic SBC exhaust option, the Small Block Chevy 283-400 V8 Performance Exhaust Header is a natural match to consider after the intake side is sealed and the engine combination is confirmed.
Before stacking intake, carb, cam, and exhaust changes, review common fitment mistakes that can turn a simple airflow upgrade into a leak or drivability problem.
Frequently Asked Questions
Q: What are the Chevy 350 intake manifold torque specs?
A: For many traditional pre-Vortec Chevy 350 12-bolt intake manifolds, cast iron intakes are commonly torqued to about 30 ft-lbs, while aluminum intakes are commonly torqued to 20–25 ft-lbs. Always follow your specific intake and gasket manufacturer instructions.
Q: What is the Chevy 350 intake manifold tightening sequence?
A: Use a center-out sequence. Start with the middle bolts, then work outward in an alternating pattern so the gasket compresses evenly and the manifold does not lift at the corners.
Q: Do all Chevy 350 intake manifolds use the same bolt angle?
A: No. Traditional early SBC heads use vertical intake bolts, while many 1987–1995 TBI / center-bolt-era heads may use angled center bolts. Always confirm the head style and manifold bolt pattern before tightening.
Q: Do I need to re-torque the intake manifold bolts on my Chevy 350?
A: If the gasket or manifold manufacturer recommends it, yes. Aluminum intakes on cast iron heads can lose preload after heat cycles. Let the engine reach operating temperature, cool completely, then recheck torque in the same center-out sequence.
Q: Should I use cork end seals on a Chevy 350 intake manifold?
A: Many builders discard the cork or rubber end seals and use a thick bead of RTV silicone on the front and rear China walls. Follow the gasket manufacturer’s instructions and add extra care at the four corner joints.
Q: Do Chevy 350 intake manifold bolts need thread sealer?
A: Some SBC intake bolt holes may need thread sealer depending on head, block, and manifold design. Use PTFE thread sealer where service information or the manifold/gasket instructions call for it.
Q: Why is my Chevy 350 idling high after intake manifold replacement?
A: A high idle after intake work usually points to a vacuum leak, carburetor base leak, uncapped vacuum port, gasket misalignment, or distributor/timing issue. Check those areas before blaming the intake manifold.
Q: Why is my Chevy 350 burning oil after intake manifold replacement?
A: If there is no external leak, the intake gasket may be leaking inward toward the lifter valley. Vacuum can pull oil mist into the intake runners, causing blue smoke, plug fouling, detonation, and oil consumption.
Q: Why is coolant leaking after I installed the intake manifold?
A: Common causes include shifted intake gaskets, poor surface cleaning, uneven torque, thin RTV at the corner joints, or using the wrong intake for the cylinder heads.
Q: Will a pre-Vortec Chevy 350 intake fit Vortec heads?
A: No. Traditional pre-Vortec 12-bolt intakes do not fit 1996+ Vortec 8-bolt heads correctly. Use a Vortec-specific intake manifold for Vortec heads.
Q: What is the difference between single-plane and dual-plane intake manifolds?
A: A dual-plane intake is usually better for street torque and throttle response. A single-plane intake is better for high-RPM airflow on modified engines with the cam, carb, gearing, and exhaust to support it.
Q: Can I use a stock Quadrajet carburetor with these manifolds?
A: SPELAB manifolds feature a standard 4150 square-bore flange. If your Chevy 350 has a stock Quadrajet spread-bore carburetor, you will need the correct adapter plate.
Conclusion
For a traditional pre-Vortec Small Block Chevy, the safe Chevy 350 intake manifold torque specs are usually 30 ft-lbs for cast iron and 20–25 ft-lbs for aluminum, tightened in a center-out 12-bolt sequence using a 3-pass method.
The torque number matters, but it is only part of the job. Confirm the head style, check 72° vs 90° bolt angle where relevant, use the correct intake pattern, mark the distributor, align the gaskets, seal the China walls properly, use thread sealer where required, and recheck torque after heat cycles if the manufacturer recommends it. That is what keeps a simple intake swap from turning into a vacuum leak, coolant leak, or internal oil-burning nightmare.


